- Secure order
- Easy return shipment
- Service-Hotline 04231 - 66811
Instructions No. 3237
Difficulty: Beginner
Working time: 1 hour

Step 1: Folding the box
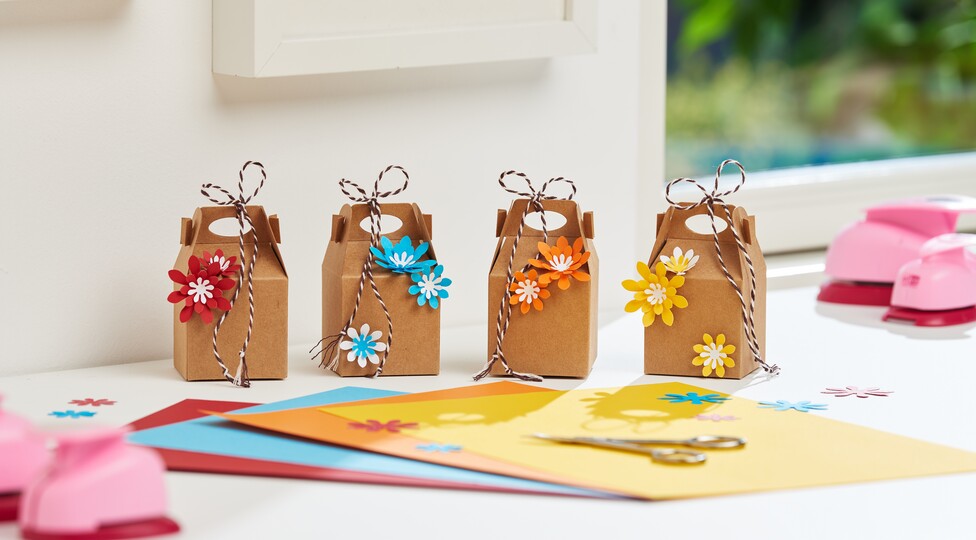
Start by creating your folding box. Fold the box according to the folding lines. Make sure that all corners are neatly folded so that the box retains its shape and remains stable.
Step 2: Punch the flowers
Now it's time for the decorative elements - the small colorful flowers. Use a flower punch - a helpful tool that cuts out delicate flower designs from various papers or even thin cardboard. If you don't have a flower punch, you can find a wide variety in our range Selection. Make sure to punch different sizes and colors to give the packaging depth and vibrancy.
Step 3: Glue the flowers on top of each other
Now comes the creative part: bring your die-cut flowers to life by gluing them on top of each other. Start with the largest flowers and place smaller ones on top. Use a glue like ours VBS handicraft gluethat dries transparent so that the overall picture looks harmonious. Experiment with the colors and shapes - there are no limits to your creativity!
Step 4: Decorate the box
Once the glue has dried, you can attach the flowers to the box. Arrange the flowers evenly across the surface or in a decorative pattern. Complete the decoration with a pretty cord, that you tie to the handle of the box. This little addition gives your box a rustic yet elegant touch.
Let your creativity blossom!
Your customized folding box is now ready to transform a gift into a real masterpiece. These handmade works of art are not only an eye-catcher, but also show the love and care you put into every package.


