- Secure order
- Easy return shipment
- Service-Hotline 04231 - 66811
Instructions No. 3365
Master the magic ring: the basis for enchanting amigurumis
Welcome to our series"Crocheting amigurumis for absolute beginners". Today we're picking up our crochet hooks together and diving into the wonderful world of amigurumi. A magic ring forms the solid basis for many projects, be it a ball head, ears or appliqués. This technique allows you to create an almost invisible beginning that securely encases the filling material. So let's get started!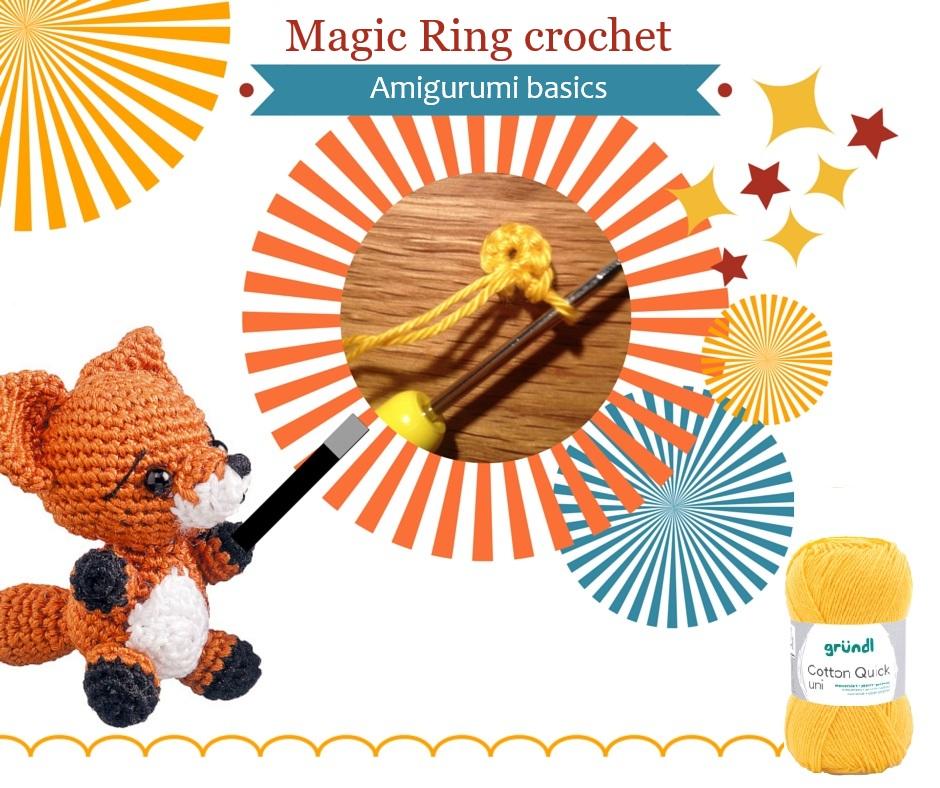
What is a magic ring?
A magic ring, also known as a yarn ring, is a method of starting crochet projects in the round while keeping the hole in the center of the ring to a minimum. This technique is particularly advantageous for amigurumi, as it securely encloses the contents, such as batting. Sounds magical, doesn't it?
Step-by-step instructions for the Magic Ring
Step 1: The beginning
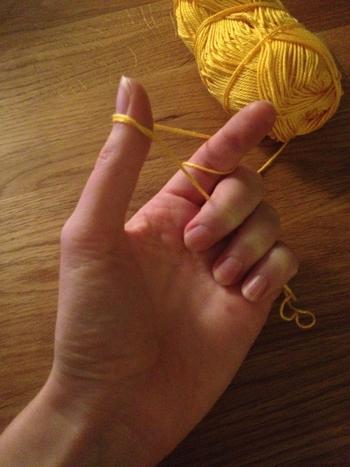
Start by passing the end of the thread through your left hand. The thread should run over your little finger and disappear behind the next three fingers. Wrap it around your index finger again and then around your thumb. Hold the end of the thread with your middle and ring fingers. The position should now look like this:
Step 2: Pick up the yarn
Hold the crochet hook in your right hand and stitch into the ring on your thumb from above. Pick up the taut yarn between your thumb and index finger and make a yarn over. Pull the loop through the thumb loop to form a loop on the needle. Repeat this process for a second loop.
Step 3: Form the ring
Loosen the thumb loop from thumb and hold the crocheted loop. The original loop becomes a ring. Make sure that it does not lose any threads and is two-threaded at the top. This piece of the yarn end is crocheted at the same time.
Step 4: The first stitches
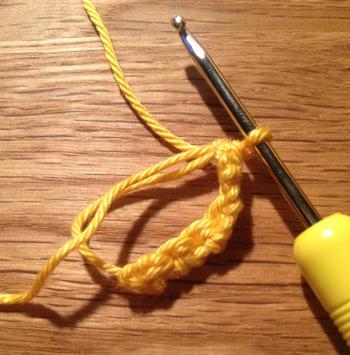
This is where your crochet work begins: Crochet six single crochet stitches into the ring.
Make five more stitches in the same way. Your ring should now look like this:
Step 5: Unleash the magic
Now we bring the true magic of the ring to life. Pull the end of the yarn to close the ring and make sure that the single crochet stitches are positioned correctly. Your magic ring should look like this:
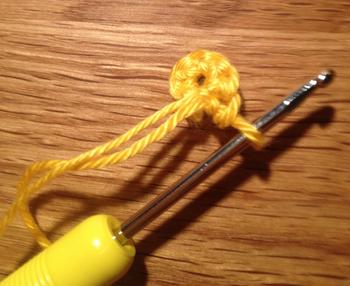
Make sure that the "Vs" of the single crochet stitches are on the outside so that you can tie into them in the coming rounds.
Finally, here is a small preview of the next round:
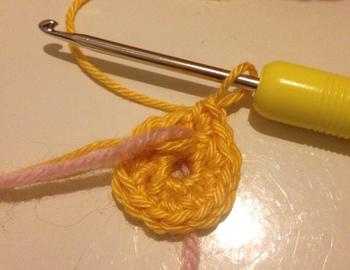
Start your amigurumi project!
You have now mastered the magic ring technique! Use your knowledge to create enchanting amigurumis.