Easter is just around the corner, and what better way to surprise your loved ones than with delicious treats in homemade gift wrappings? Let your creativity run wild and make an enchanting Easter bunny packaging that will showcase your homemade delicacies in style. In this step-by-step guide, you will learn how to create a unique gift idea for Easter with just a few materials and a little skill.
Easter bunnies gift wrapping: Beautiful and individual
1. Making the basic shape
First of all, draw a strip on a light brown coloured paper that is slightly wider than your cellophane bag. For standard bags, this could be 10 cm, for example. Then mark the areas for the belly (approx. 12 cm), bottom (approx. 4 cm, slightly wider than the bottom of the bag), back (same width as the belly) and head (approx. 5 cm, depending on the height of the body).
Round off the corners of the head area. To maintain symmetry, you can use a stencil for this. Then cut everything out.

Fold the markings on your bunny's body. A ruler can help you to achieve straight edges. Bend the Paper up against it and trace the fold.

2. Design the details
No Easter bunny without details! Cut out ears from brown coloured paper (scraps are often sufficient) to match the size of the basic body. Place a piece of paper underneath so that there is a little overhang for gluing.
transfer the ear shape to pink cardboard, cut out a smaller version and glue both layers together. Remove any remaining pencil marks.

Draw noses on pink cardboard and teeth on white cardboard, cut them out and leave some space for gluing. Cut the nose hairs from cotton cord (2-3 pieces are enough).
Attach the nose hairs with a blob of handicraft glue, leave to dry and glue the nose on top. Attach the teeth from the back of the head. Use a black marker to add eyes and, if desired, eyebrows - but this can also be done with craft cardboard sheet.

Finally, glue the ears to the center of the back of the head.
3. Decorating and filling
To give your bunny the finishing touch, you can decorate it with feet, bows, ribbons, sprinkles or shading with colored pencils.
Fill the cellophane bags with your gifts, roll up the top end and attach it to the top of the belly with a stapler.

Then stick the head directly onto the belly. Double-sided adhesive tape makes this process easier.
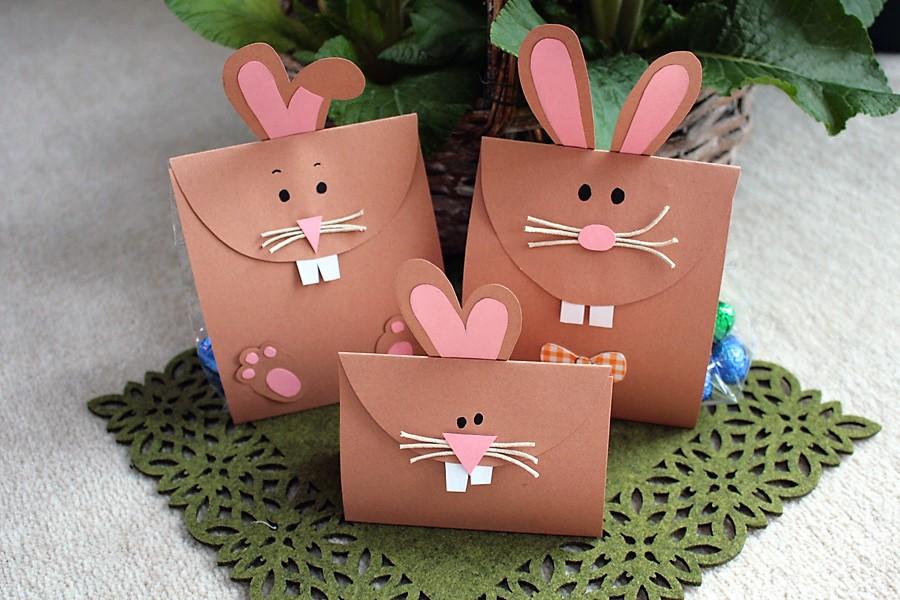
Your personalized Easter gift wrapping is ready!

Whether playful, elegant or cute - each bunny shows your personal style! Have fun crafting and designing.

Order all the materials you need for your creative Easter bunny now from the
VBS Hobby online store and let your creativity run wild!