- Secure order
- Easy return shipment
- Service-Hotline 04231 - 66811
Instructions No. 3228
Difficulty: Beginner
Working time: 3 Hours
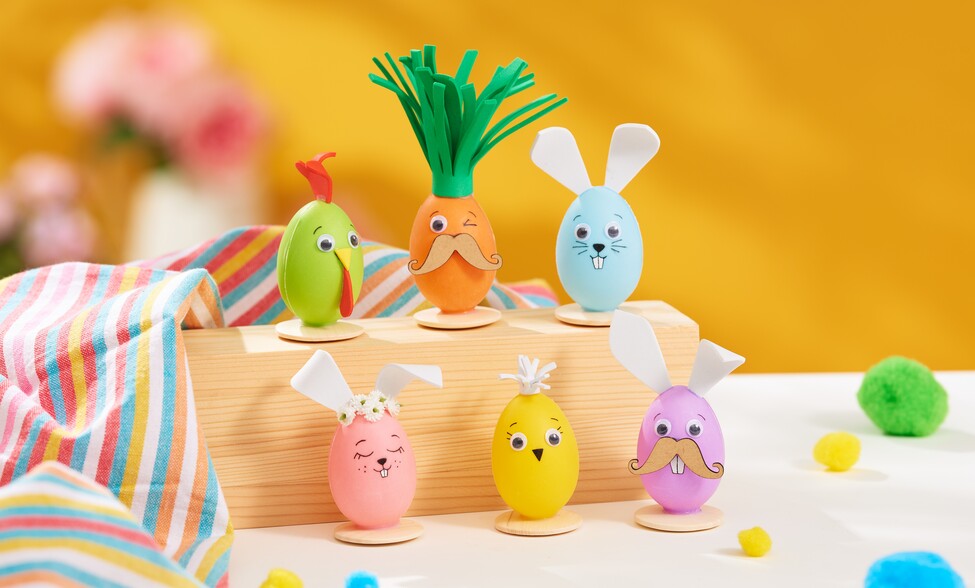

Step 1: Preparing the eggs
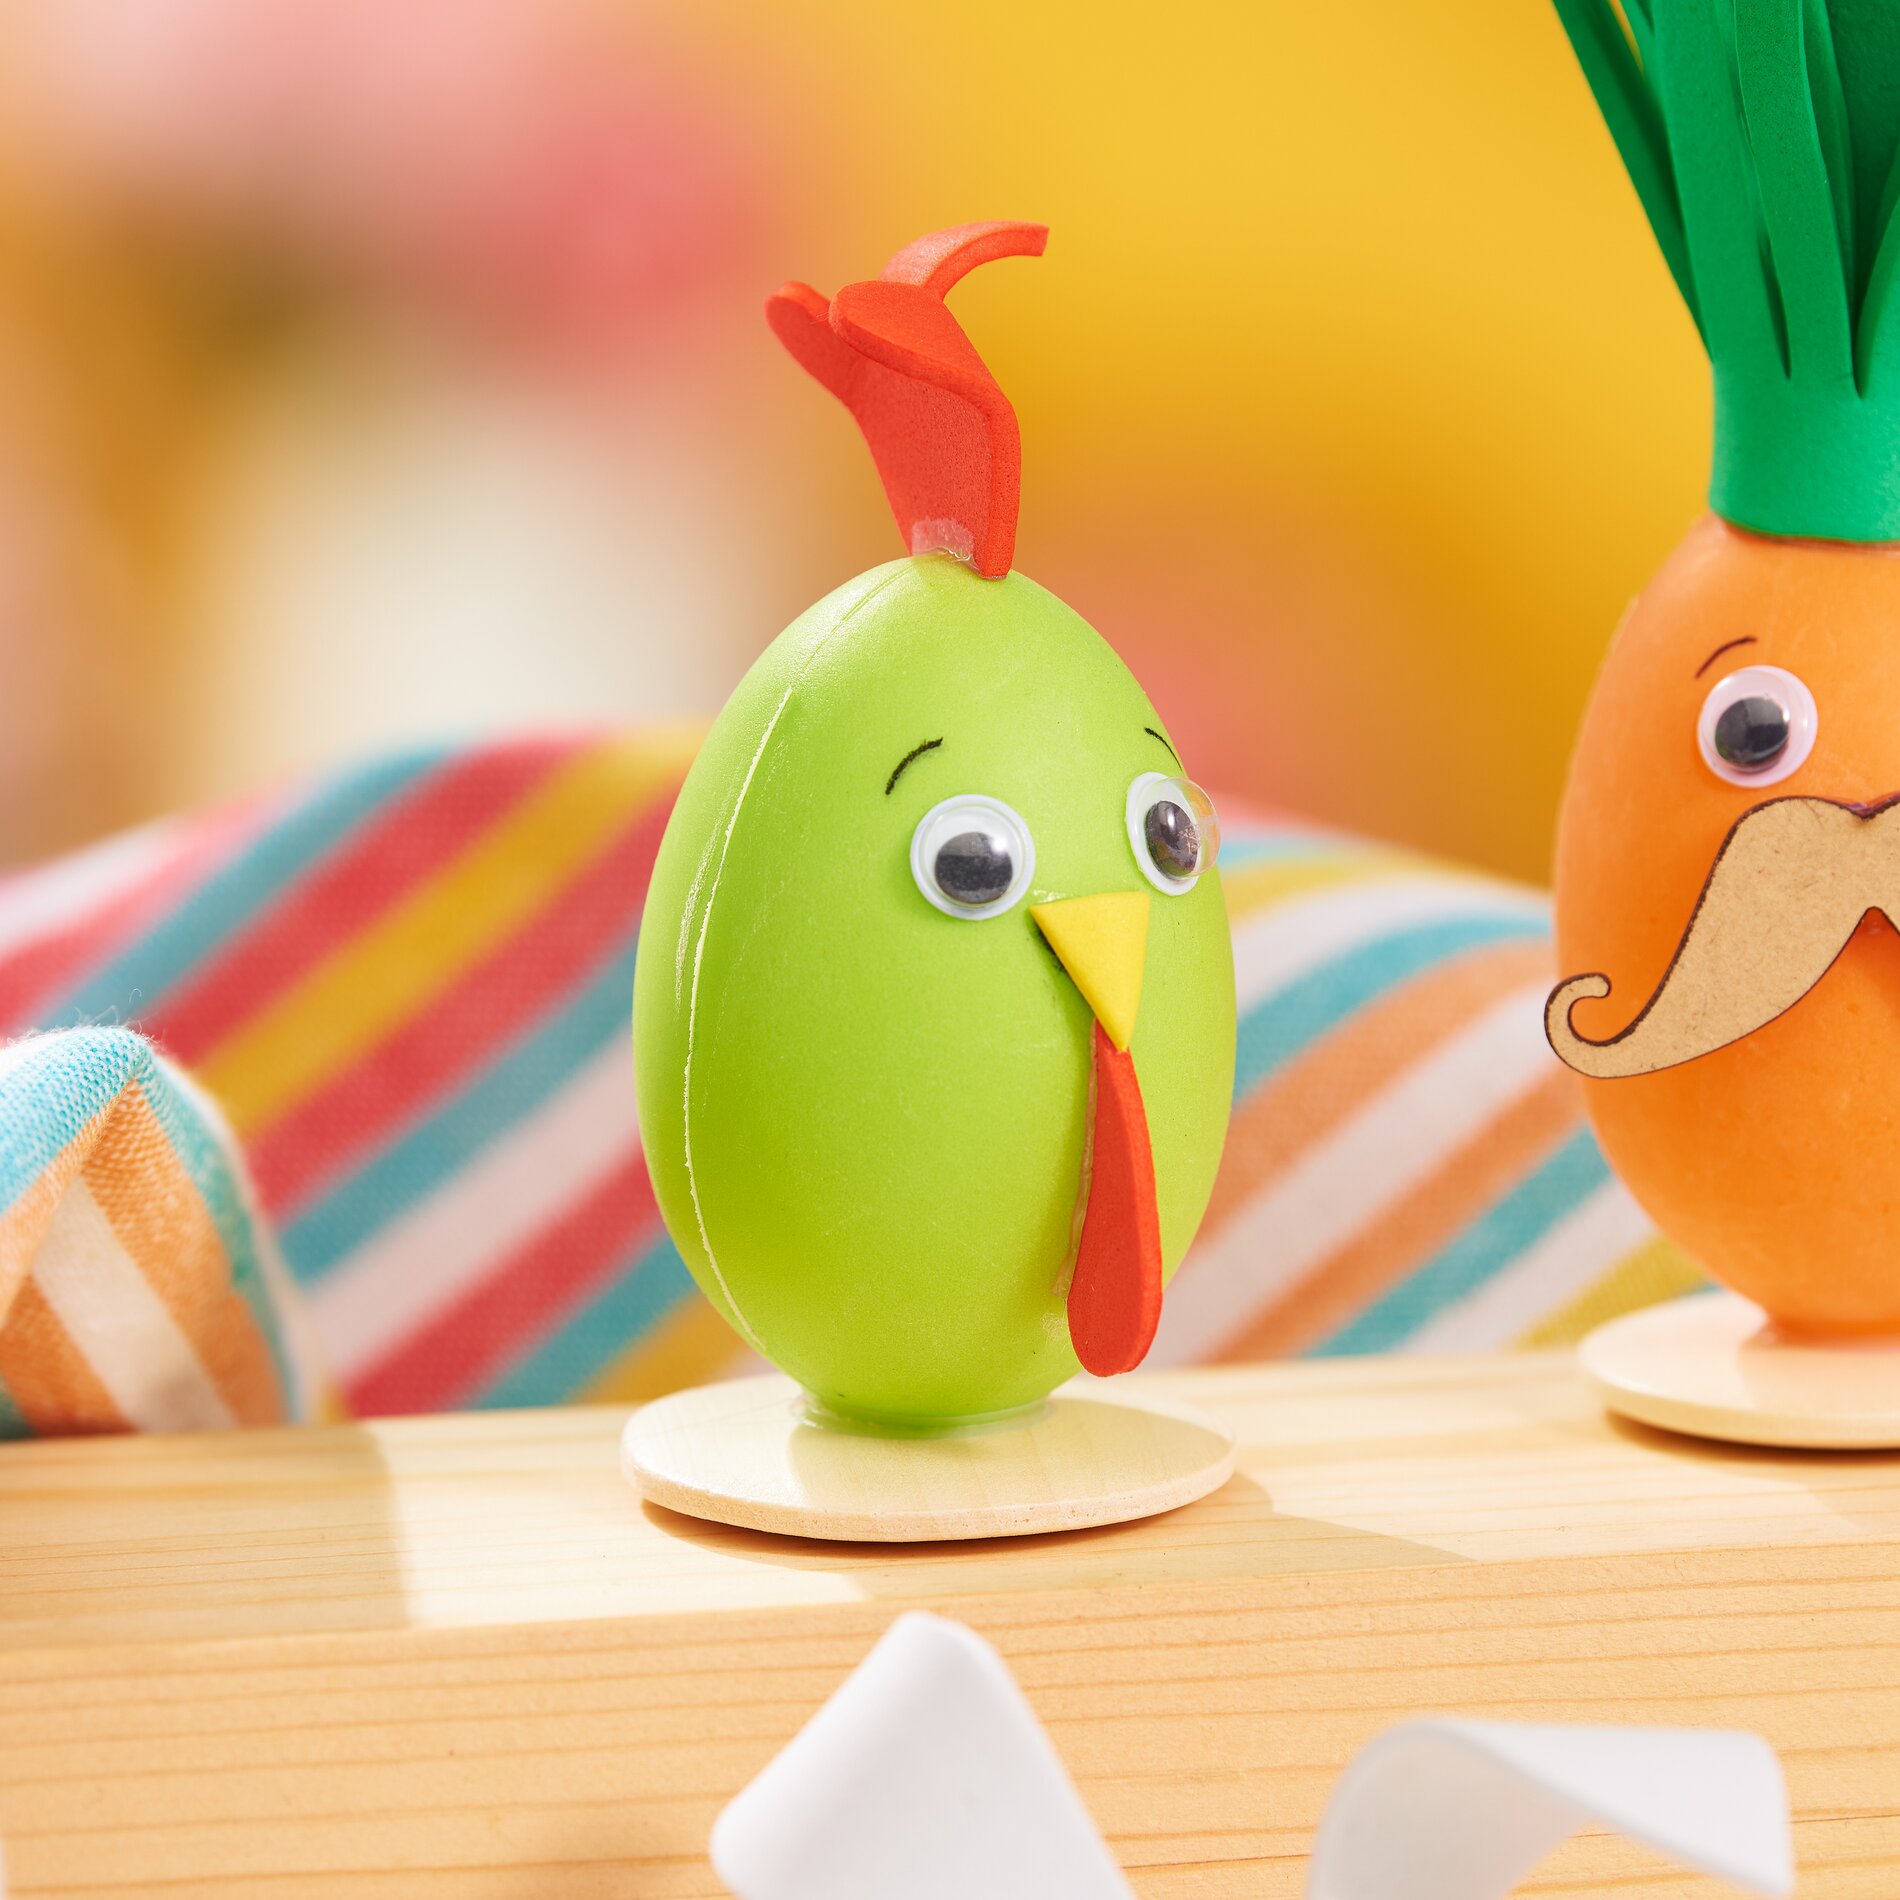
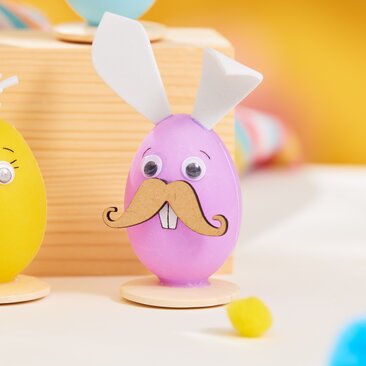
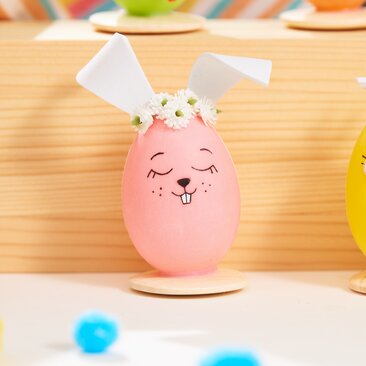
First remove the ribbon from the eggs, which is often used for hanging. Then glue the eggs onto wooden boards.
Step 2: Working with the foam sheets
Take the templates and transfer them to the foam sheets. Carefully cut out the foam rubber shapes. foam sheets is ideal for crafting as it does not fray. Then stick the cut-out pieces of foam rubber in the desired places on the eggs.
Step 3: Designing the carrot
For the carrot hat, cut a 4 cm wide strip from foam sheets. This is a flexible material that keeps its shape well. Cut fringes into the strip to imitate the look of carrot leaves. Roll up this fringed strip and stick it to the top of the carrot egg.
Step 4: Draw and paint the faces
Now it's time to get creative! Use a pencil to sketch the funny faces directly onto the eggs. This method allows you to easily correct mistakes before you paint over the faces. Choose colors that give your eggs character and trace the pencil lines with a marker .
Step 5: Glue on the eyes and beard
Once the paint has dried, glue the wobbly eyes on. Add a small beard to some of the figures, which you can easily attach with a little glue.
Step 6: Pompom and flower wreath
Finally, give the bunny figures the classic pompom tail, which you attach to the back. For the girl bunny, you can decorate her with a pretty wreath of flowers on her head.