- Secure order
- Easy return shipment
- Service-Hotline 04231 - 66811
Instructions No. 2856
Difficulty: Beginner
Working time: 2 Hours

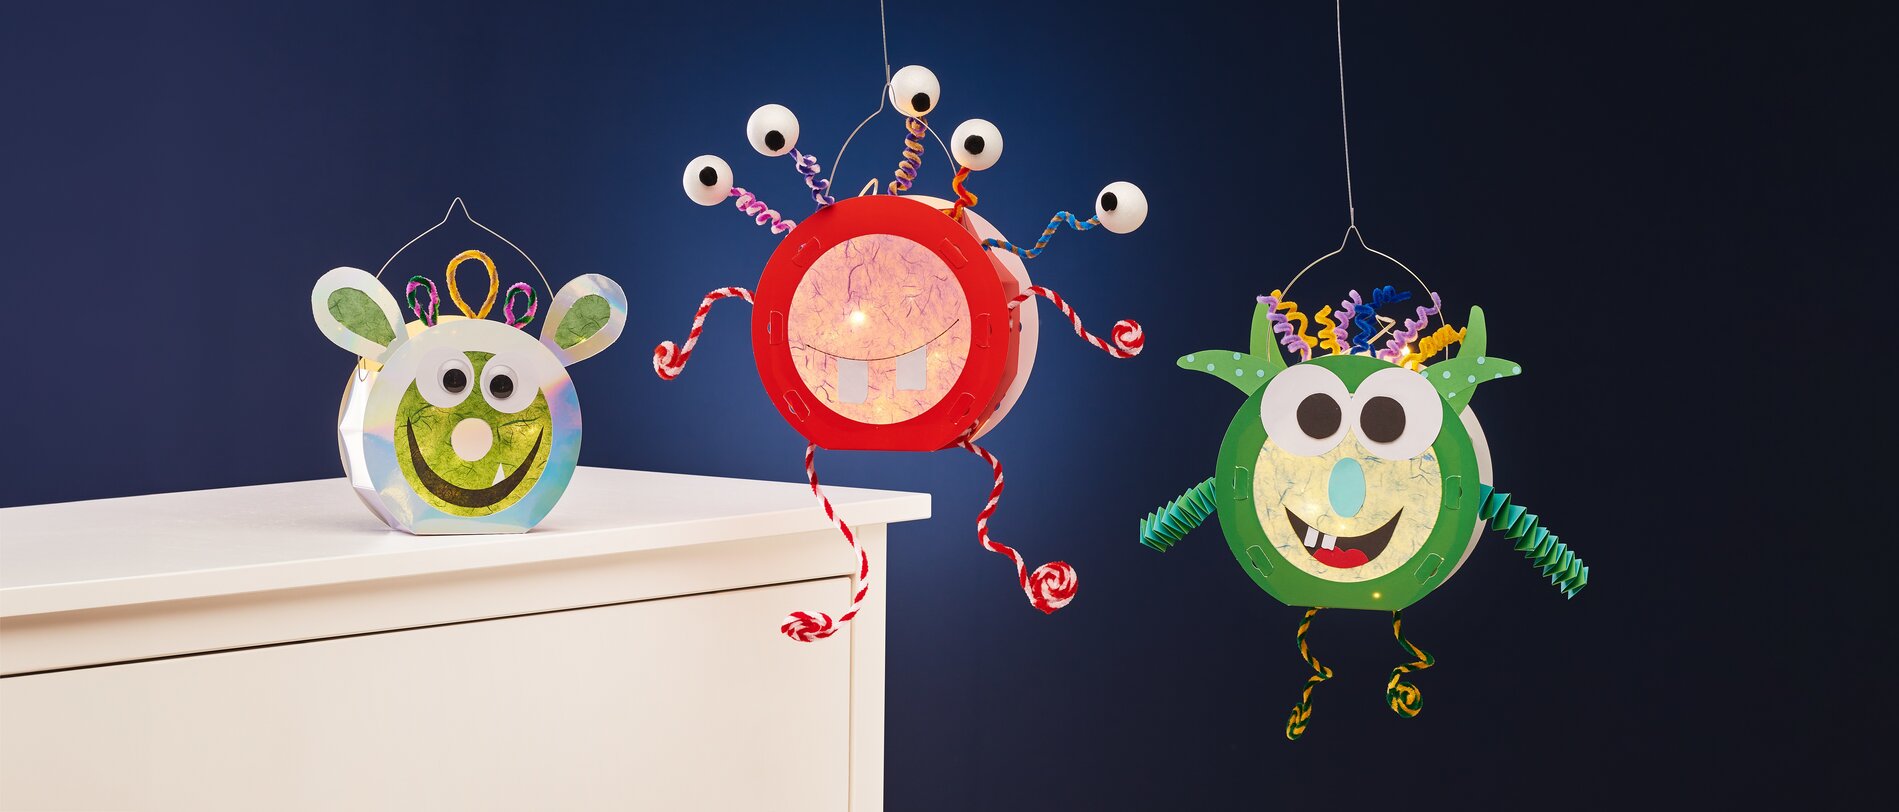
You can let your imagination run wild with these cute monsters.
Print out our template and transfer the motifs onto a piece of paper in any color craft cardboard sheet.
Stick the straw silk paper to the inside of the lantern blank. Tip: You can use two different colors of fiber silk for one lantern blank so that one set is enough.
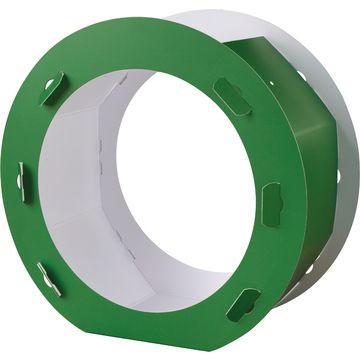
After drying, crease the lantern blank at the pre-folded points, pin them together and fix them with some handicraft glue. Now insert a lantern hanger through the holes provided and bend the ends with the jewelry pliers VBS Jewelry pliers.
Now you can glue a face onto the monsters. Pupils and teeth can be glued on with 3D-glue pads . For the eyes, you can also use a polystyrene ball and a black pompom, stick them on chenille wire and glue them to the monster, or you can glue on wobbly eyes .
For the arms and legs, you can fold 2 cm wide paper strips "witches' steps" or simply use them chenille wire and stick them to the edge of the lantern. For the witches' steps, you need two 2 cm wide paper strips, of the same length, which you lay on top of each other at right angles and glue together. Now always fold the lower paper strips over the upper one. At the end, glue the strips together and pull the staircase apart slightly.
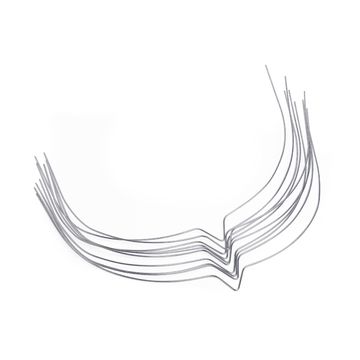
Finally, bend the wires of the chain of light into a large ball and place this inside the lantern. You can also fix individual bulbs with hot glue, e.g. if you are making ears for your monster in which it should also light up. You can place the battery compartment inside or glue it to the top edge of the lantern with hot glue. If the lantern rod is too long, you can cut it to the desired length with scissors.
Thanks to the timer function of the chain of light the lantern can be used as a great night light in the children's room after the move.