- Secure order
- Easy return shipment
- Service-Hotline 04231 - 66811
Instructions No. 3488
Difficulty: Beginner
Working time: 4 Hours


Preparing the templates
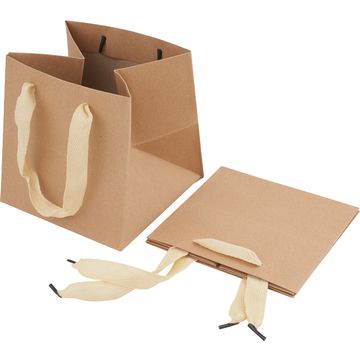
Start your project by printing out the templates and cutting them out carefully. First remove the existing ribbons from the gift bags to prepare them for the new decoration.
Creating the felt decoration
Place the rectangular templates on the green felt and trace them with a marker pen. Make sure you have two large (A) and two small (B) pieces of felt ready for each bag. Then cut out these shapes with fabric scissors.
Now take the trouser pocket templates (E) and place them on the cut-out pieces of felt. Trace the pockets with the marker pen as well. For a decorative seam, draw a dotted line over the pockets with a white Posca-marker . Use the star-stencil (F) and the tree-stencil (G) to draw the motifs and color them in with the marker . You can also draw a dotted line between the two trouser pockets so that it looks like a continuous seam. You can put these decorated felt parts aside for later.
Designing the striped handles
Use the long striped stencils (C) to outline two stripes per bag on white craft cardboard sheet. Repeat this step with the small square stencil (D) on red craft cardboard sheet. Stick the red squares onto the white stripes to create a striped effect and leave to dry thoroughly VBS handicraft glue dry well. We needed a total of 32 for one bag - exactly how many you need depends on how far apart you stick the red strips on the white strips. Glue the red squares onto the white stripes to create a striped effect and leave to dry well VBS handicraft glue dry well.
Once dry, use hot glue to attach the striped handles to the top of the bags. This will be the new carrying system for your gift bags.
Creating the Secret Santa shoes
Draw the shoe templates (H) on red craft cardboard sheet and the edge templates (I) on white craft cardboard sheet twice for each bag. Cut out all the pieces and glue the white edges onto the red shoes to create a classic Secret Santa style.
Take two equal pieces of from knitted tube and fill them with wadding. You can now hot glue the prepared Secret Santa shoes to the end of the knitted tubes and then attach the legs to the front of the bag. The small jingles, that you can optionally attach to the tips of the shoes add an extra touch.
Finishing and decorating the belt
Shape the belt of your Secret Santa bag by transferring the belt-stencil (L) to black cardboard and cutting it out. Add the buckles using the templates (J and K). Glue the larger buckle to the center of the belt and attach it to the top edge of the gift bag. Place the small buckles on the striped handles to create a harmonious overall look for your attractive Secret Santa gift bag.
Finally, you can paint dotted lines on the edges of the bag with your Posca-marker for a stitched effect.
Create your unique Christmas gift bags now and marvel at how your loved ones will be impressed by your handmade work of art! Visit our online store to purchase all the materials you need directly and get started on your creative craft project. Let your imagination run wild and make this Christmas something special!