- Secure order
- Easy return shipment
- Service-Hotline 04231 - 66811
Instructions No. 3569
Difficulty: Beginner
Working time: 3 Hours
Easter is approaching and you're looking for a creative idea to give your home that certain something? With the cast bunny figurine and napkin technique, you are not only following a trend, but also creating a unique work of art. These instructions will show you how to create your own individual Easter decoration in just a few steps and with a little skill. Let's get started right away!
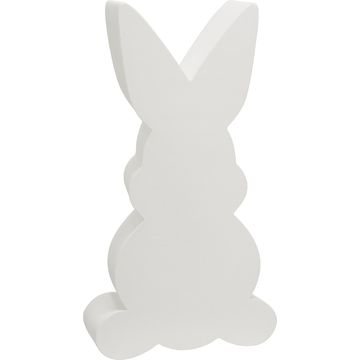
Step 1: Mix the casting powder and fill the mold
Start by mixing about three tablespoons of casting powder with water to form a creamy mixture. This mixture should be smooth and free of lumps. Then pour the mixture into your bunny mold. Tap lightly against the mold to remove any air bubbles. The mixture must now dry for around 30 minutes. Tip: Place the filled mold on a flat surface to ensure even drying.
Step 2: Demolding the bunnies and smoothing the edges
Once the drying time has elapsed, you can carefully remove the bunny from the mold. Any unevenness on the edges can be easily smoothed out with a little sandpaper . Smoothing ensures that your finished bunny looks professional. Then leave the bunny to dry completely for another 12 hours.
Step 3: Preparing the napkin motifs
Take your napkins and tear out any motifs you like. Make sure that you only use the top, printed layer of the napkin and remove the two unprinted layers. This step is important to ensure that the motifs adhere flawlessly to the bunny.
Step 4: Application of the napkin technique
Apply a thin layer of napkin varnish to the bunny. Carefully place your torn-out napkin motifs on the paint. Then apply another thin coat of napkin varnish. to the motifs. This step fixes the motifs and protects them from external influences.
Step 5: Creating a depth effect with 3D hydro-crystal varnish
As soon as the napkin varnish has dried, it's time for the highlight of your bunny figure: the 3D hydro-crystal varnish. This special varnish creates an impressive depth effect. Apply it to some of your motifs and make sure that it is well distributed. The Time to dry: takes around 60 to 180 minutes, so be patient.
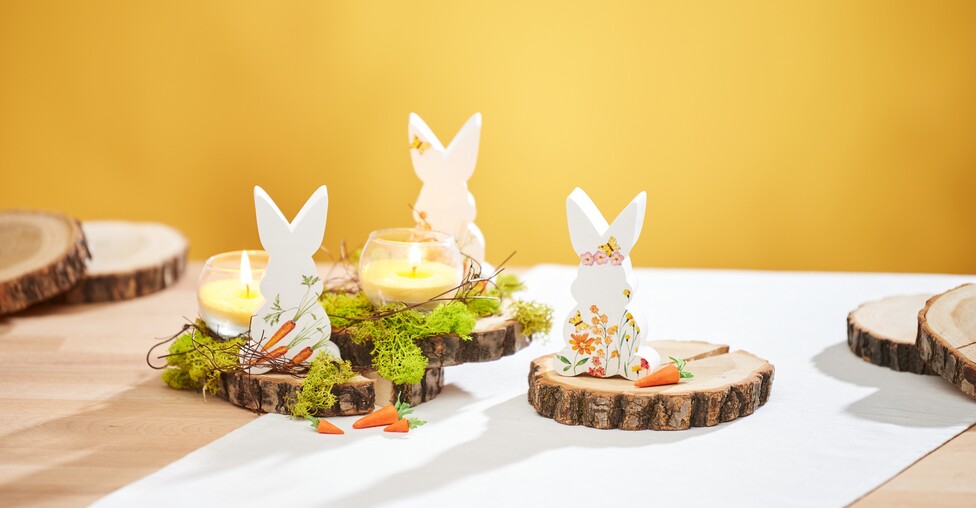
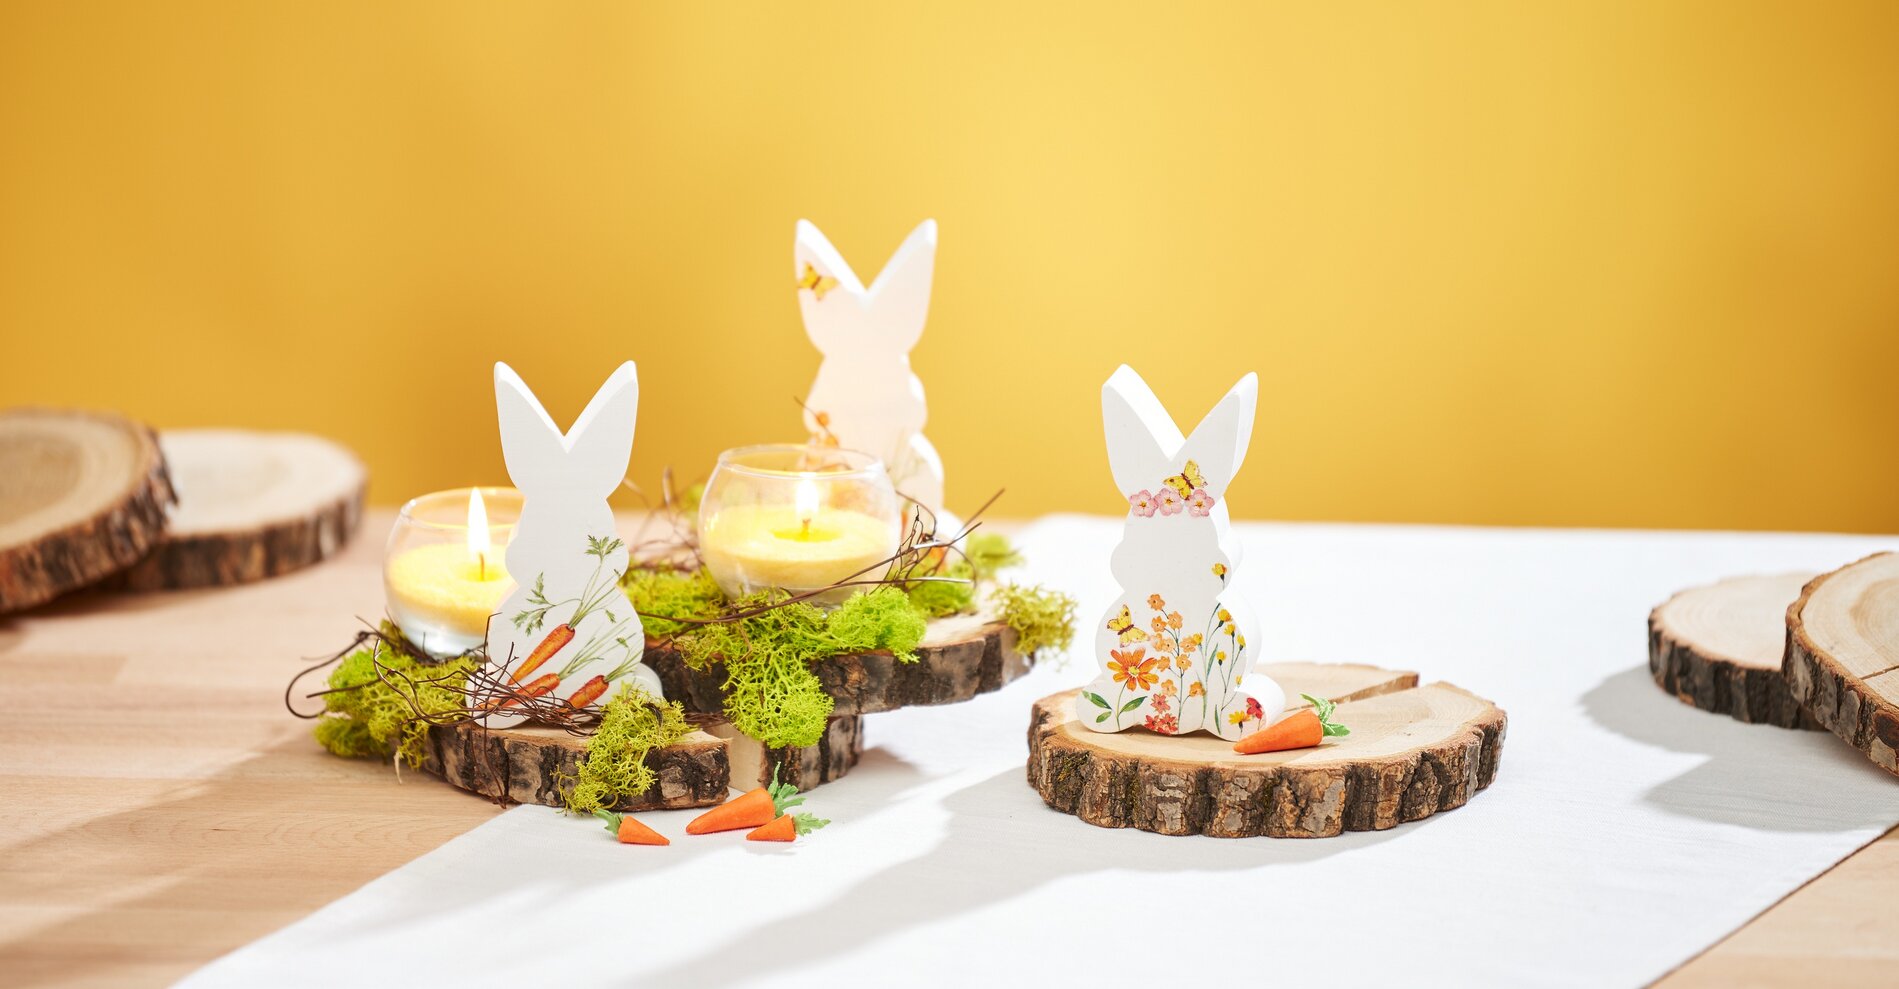
Step 6: Decorating the presentation area
For the presentation of your bunnies, glue two tree slices on top of each other, offset. Fix your bunnies to the slices with a blob of hot glue. Decorate the surface additionally with moss and decorative floss. To create an atmospheric ambience, pour some candle sand into tea light jars, trim the wick and place the jars on the tree discs. Voilà, your individual Easter decoration is ready!
Ready to get creative? Visit our online store and discover a variety of high-quality materials to create your own cast bunny at napkin technique . Let your imagination run wild and transform your home into an Easter paradise. What are you waiting for? Click now and start your next DIY-Project!