- Secure order
- Easy return shipment
- Service-Hotline 04231 - 66811
Instructions No. 3338
Difficulty: Beginner
Working time: 2 Hours
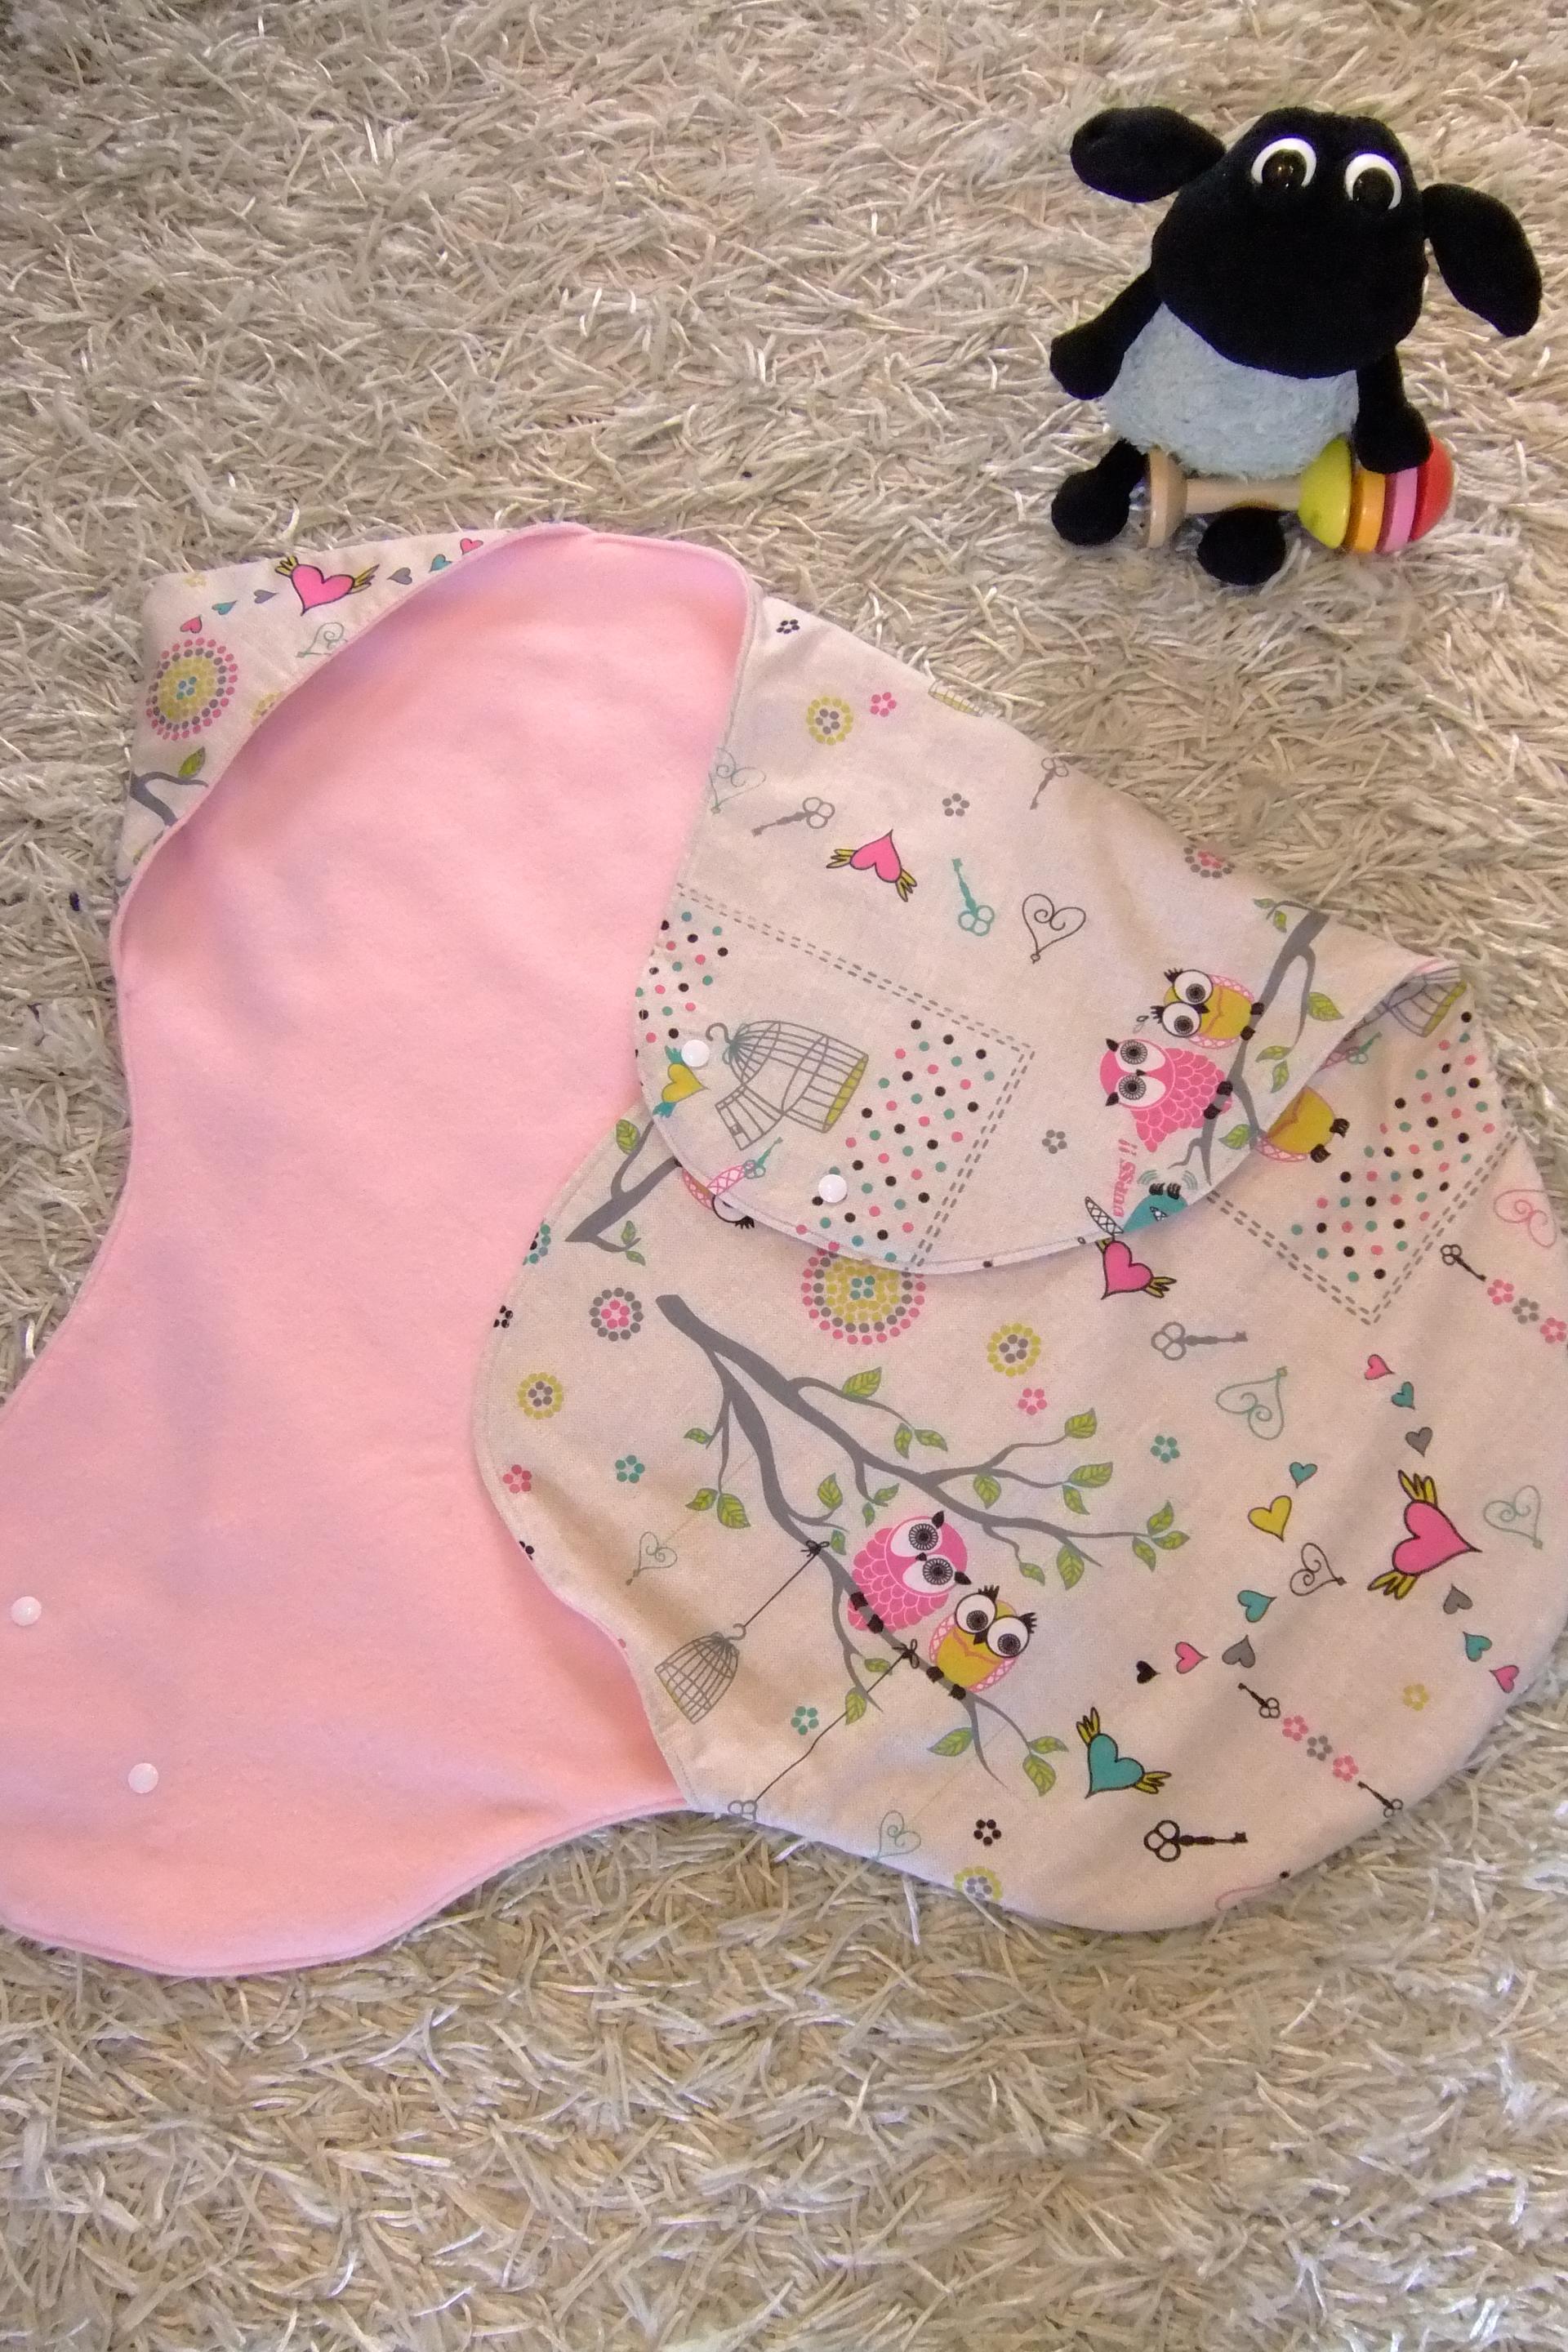
Welcome to our exciting DIY-Project! Today we'll show you how to sew your own cozy wrap blanket for babies from 0 to 6 months. This blanket is perfect for cozy hours on your arm, in the baby carriage or even in the car seat. Don't worry, even beginners will manage with these instructions! Ideal as a gift for a birth or christening or simply for your own little treasure.
The pattern
To create the pattern , download the 6 A4 pages and print them out. The pages are numbered and there are markings on the edges to help you stick them together. The blanket consists of three parts: Back, front and hood. It is helpful to mark out the front section and hood again on a separate Paper .
Download: Wrap blanket template PDF
Cutting the fabrics
Fold the cotton fabric in half so that the pretty sides are on top of each other. Place the pattern pieces on this folded edge, the fabric fold, and transfer them with a trick-marker or line ex pen. This is easy to use and disappears by itself after a few hours. Repeat this process with the fleece fabric. Now you have all the pieces twice - once from each fabric. Cut out the pieces and enjoy the shape of your future blanket!


Sew the front and hood
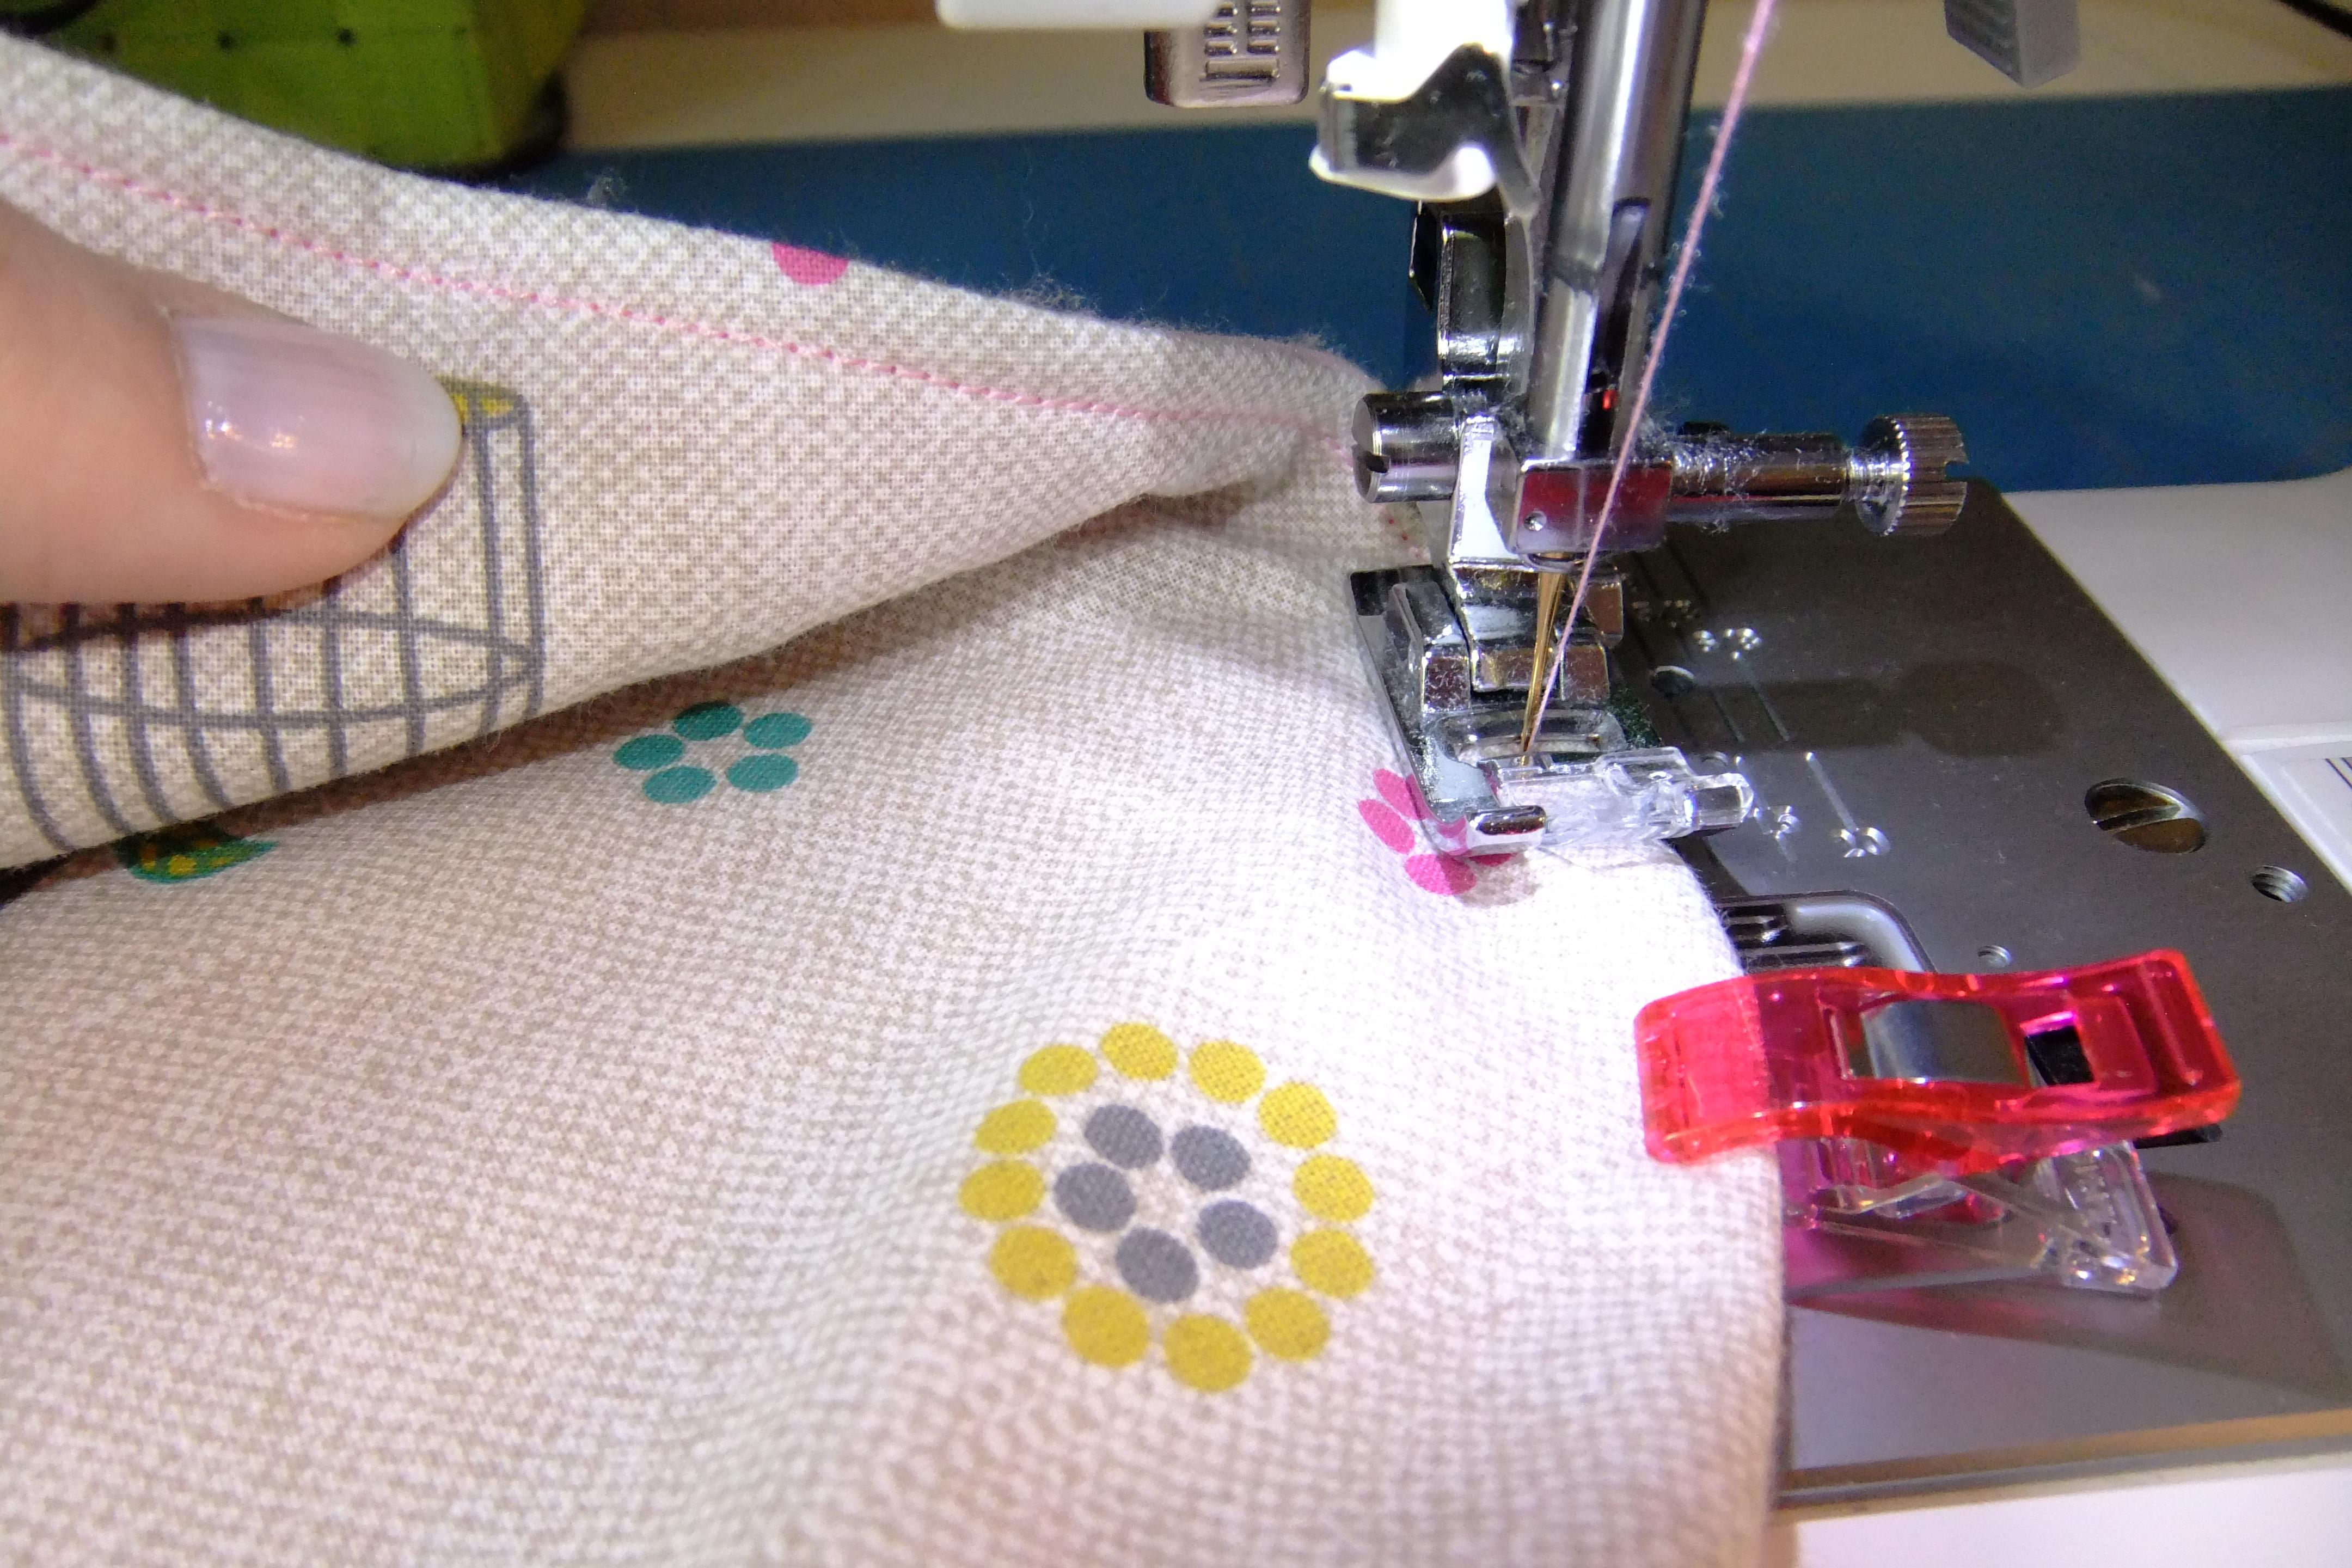
Place the fabrics for the front piece right sides together and sew the top edge together (we have marked this in the photo with a colored thread). Use Wonder Clips to hold everything in Position hold everything in place.


Now it's time to stack
As the first layer, place the back section from cotton fabric with the motif side facing up. Place the hood and the front section on top, cotton side down. And as the top layer, place the fleece fabric, with the pretty side facing down.

Sew together
Secure everything well with clips or pins. Leave a turning opening and sew once all the way around. You will need the turning opening later to turn the blanket.

Turning
Now turn the blanket through the opening so that the right sides of the fabric are facing outwards.


Close the turning opening
Close the turning opening either by hand with the mattress stitch or by machine by topstitching the seam. Make sure to fold the fabric inwards neatly.


Now your wrap blanket is actually finished! You can use it in the baby carriage, for example.
You still haven't had enough? Then we'll show you a few more things you can do to 'pimp' your blanket!
Add fasteners
Add fasteners to your blanket to prevent it from coming undone.
Variant 1: velcro strap


Belt slot for baby car seat
If you want to attach the belt slot, transfer the markings from the pattern to the finished blanket. Sew along the slit with a narrow zigzag stitch and then carefully cut it in.


That's it!
Congratulations, your swaddle blanket is ready to make your baby happy! Fancy even more creative projects? Visit our online store to find everything you need for your next sewing adventure!