- Secure order
- Easy return shipment
- Service-Hotline 04231 - 66811
Instructions No. 3352
Difficulty: Beginner
Working time: 3 Hours
Introduction
Would you like to transform your balcony or garden into a real oasis of well-being? A homemade wind chime is just the thing to give your outdoor area a very personal and creative touch. With only just a few materials and a few simple steps, you can create a decorative highlight that is not only visually stunning only but also produces gentle sounds in the wind. Let's get started and find out how easy it is!
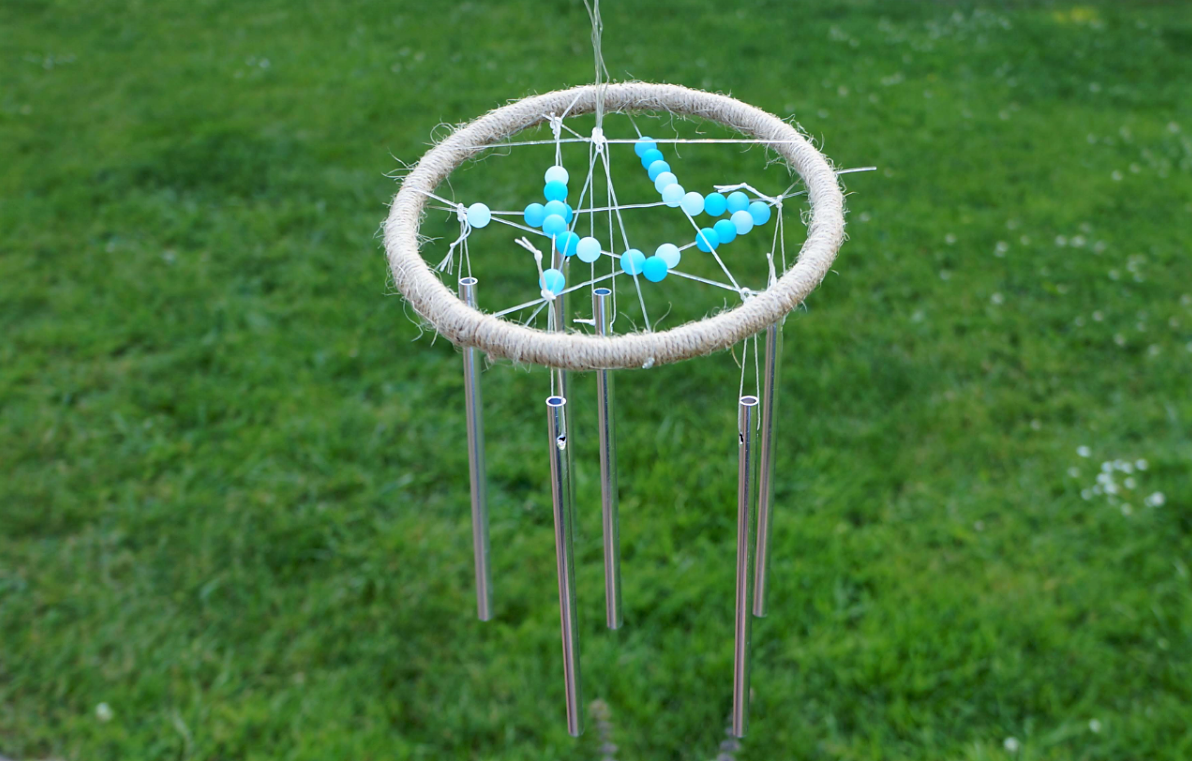
Wrap the cane ring
Take the cane ring and the raffia ribbon. Start with a double knot around the ring and wrap the entire ring with the ribbon. The short end of the knot should also be wound up so that it does not have to be cut off. It is important that the ribbon is tight. Once complete, wrap another double knot and cut off the ends on the inside of the ring so that they do not stand out. Your cane ring is now ready for the next steps.


Attach the transparent cord and beads
Thread the desired number of beads onto the transparent cord. For this example, 25 beads have been strung. Knot the cord at any point on the wrapped ring. Tighten the knot and wrap the ribbon around the ring in a star shape. Wrap it around the ring to keep it in place. Don't let the beads get in the way, you can move them later as the ribbon is elastic. Once you are happy with the arrangement, knot the end to the outer ring and cut it off. Rearrange the beads until you are happy with them.


Attaching the pendant
The basic structure for the wind chime is ready. Attach the suspension so that the wind chime can be hung up. To do this, use the transparent ribbon again and knot it at three points on the outer ring. The cords should come together in the middle. To balance the center, thread some beads onto the strings or knot them. Once you have hit the center well, tie a loop for hanging.

Knot the sound sticks and listen to the wind
Once the suspension is in place, knot the sound sticks to the lower transparent strings. Position them as you wish, but make sure that the weight is evenly distributed so that the wind chime can swing freely in the wind. In this example, the chimes were attached to the end of one side of the star and the last chime was knotted in the middle. Now find a nice place for your individual wind chime and enjoy the calming melody in the wind.

Try it out for yourself and create your own creative and relaxing outdoor oasis. You can find all the materials you need for this project in our online store. Have fun making it!