- Kauf auf Rechnung
- Sichere Bestellung
- Gratis Rückversand
- Bestell-Telefon 04231 - 66811
Anleitung Nr. 3336
Schwierigkeitsgrad: Einsteiger
Arbeitszeit: 1 Stunde
Ostern steht vor der Tür und es wird Zeit, die Deko aufzufrischen! Küken und Hühner gehören genauso zu Ostern wie Ostereier und Hasen. Wenn du auf der Suche nach einem natürlichen und originellen DIY-Projekt bist, haben wir genau das Richtige für dich: Küken in Betonoptik! Diese charmanten Dekorationen verleihen deinem Zuhause einen Hauch von Modernität und Einzigartigkeit. Lass deiner Kreativität freien Lauf und gestalte jedes Küken ganz individuell nach deinen Vorstellungen. Mit unserem einfachen Schritt-für-Schritt-Leitfaden gelingt dir dieses kreative Projekt im Handumdrehen.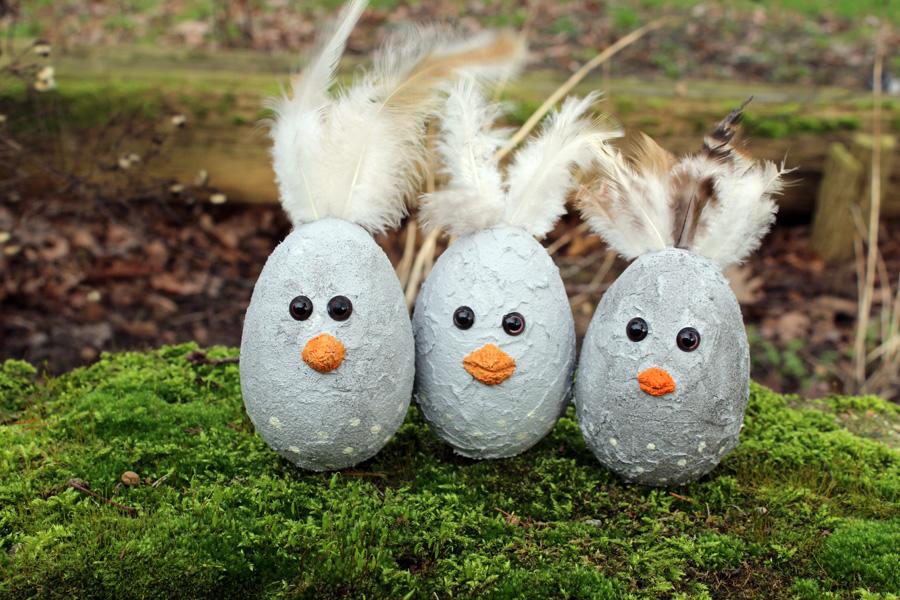
Schritt 1: Betoneier herstellen

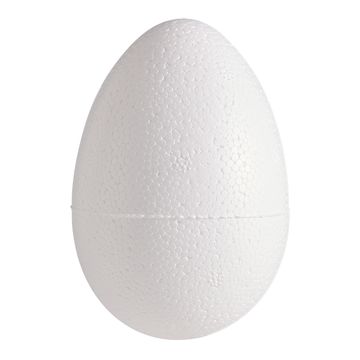
Zuerst bereitest du die Styroporeier vor: Drehe die Bärenaugen ein wenig in das Styropor, sodass sie noch nicht ganz anliegen. Dies gibt den Augen einen besseren Halt. Um das Eindrehen der Augen zu erleichtern, kannst du vorher mit einem Schaschlikspieß kleine Löcher vorstechen.
Tipp: Um das Arbeiten zu erleichtern könnt ihr die Styroporeier auf Schaschlikspieße oder ähnliches aufspießen. Das schmiert weniger und man kann sie besser zum Trocknen bei Seite stellen.
Zeit für die Betonmasse! Rühre sie kräftig durch und trage sie zunächst um die Augen herum auf. Drücke die Augen nun komplett an und überziehe das gesamte Ei mit der Betonmasse. Möchtest du eine glattere Oberfläche? Nutze die Schwämme im Set, um den Beton zu glätten.

Jetzt wird es spannend: Forme mit dem Spachtel die Schnäbel. Hier hast du zwei Möglichkeiten: Entweder direkt am Küken oder separat auf Folie und befestigst sie später. Bei der Variante mit dem Schnabel auf der Folie, kannst du den Schnabel auch vorsichtig anhebenund auf das Ei setzen, während er noch nicht vollständig getrocknet ist. So trocknet es dann von alleine an.
Hast du einen Fön zur Hand, kannst du die Betonmasse auch leicht antrocknen, so dass die Außenseite nicht mehr klebt und dann vorsichtig mit den Händen formen.

Lass die Betonmasse vollständig durchtrocknen, bevor du mit Schritt 2 fortfährst.
Schritt 2: Küken bemalen und befedern
Sollten die Oberflächen noch Unebenheiten aufweisen, kannst du sie vorsichtig mit Schleifpapier glätten. Nachdem dies geschehen ist, wird es Zeit, die Küken zum Leben zu erwecken! Die im Beton-Set enthaltenen Lasuren verstärken den Betoneffekt nochmals, indem du die Oberfläche etwas abdunkelst oder aufhellst.
Nun greife zur Bastelfarbe und verleihe dem Schnabel einen schönen Anstrich. Setze mit dem Pinsel dekorative Punkte auf den unteren Teil der Küken, um ihnen noch mehr Charakter zu geben.

Fast geschafft! Pieke kleine Löcher in die Oberseite der Eier und stecke nach Belieben Federn hinein. Sollten sie nicht von allein halten, verwende etwas Bastelkleber.

Nachdem Farbe und Kleber getrocknet sind, sind deine Küken bereit, in ihrem neuen Glanz zu erstrahlen!

Viel Spaß beim Herstellen deiner einzigartigen Osterdekorationen! 
Bereit, deine Kreativität auszuleben? Hol dir jetzt alle Materialien in unserem Onlineshop und lass deiner Fantasie freien Lauf. Deine DIY-Küken in Betonoptik werden das Highlight deiner Osterdekoration!