- Secure order
- Easy return shipment
- Service-Hotline 04231 - 66811
Instructions No. 3323
Difficulty: Beginner
Working time: 1 hour
1. Transfer and cut out the templates
First, download the template and cut it out. then transfer the outer contours to the Paper, which will form the basis for the respective satchel.
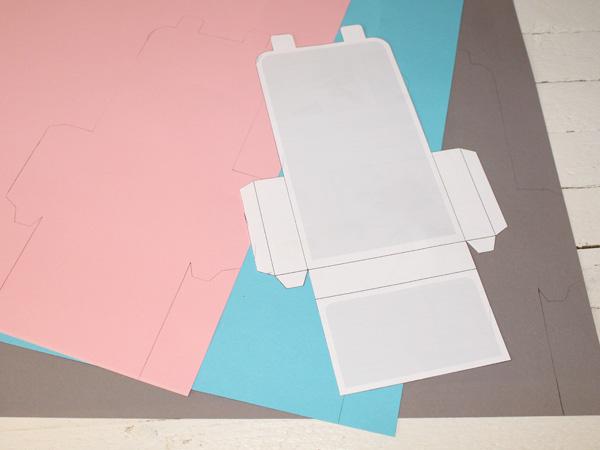
Once you have drawn enough satchels, cut out the gray areas of the template, transfer them to the motif cardboard and cut out the panels as well.


Fold the edges of the Paper according to the template. The sides (without gluing) and the bottom must all have the same width, in this case 2 cm.


Hold the satchel in both hands and carefully shape the lid with your hands. Adjust the Paper depending on how high or low the satchel closes. Fold the invitation so that it fits into the satchel and close it with a strip of double-sided tape adhesive tape.
3. Attach the individual parts
Cut two strips approx. 1.5 cm wide and 8 cm long and one strip 1 cm wide and 10 cm long from the base paper. Glue the narrow strip to the top of the satchel with a little handicraft glue at both ends. As long as the glue has not yet set, you can align the handle.
Use the wide strips for the back straps, bend the ends a little at a time and glue them to the back of from the satchel. Once the strips are secure, you can carefully pull or press them into shape.
In addition, glue two wooden buttons in matching colors to the front as a fastener.

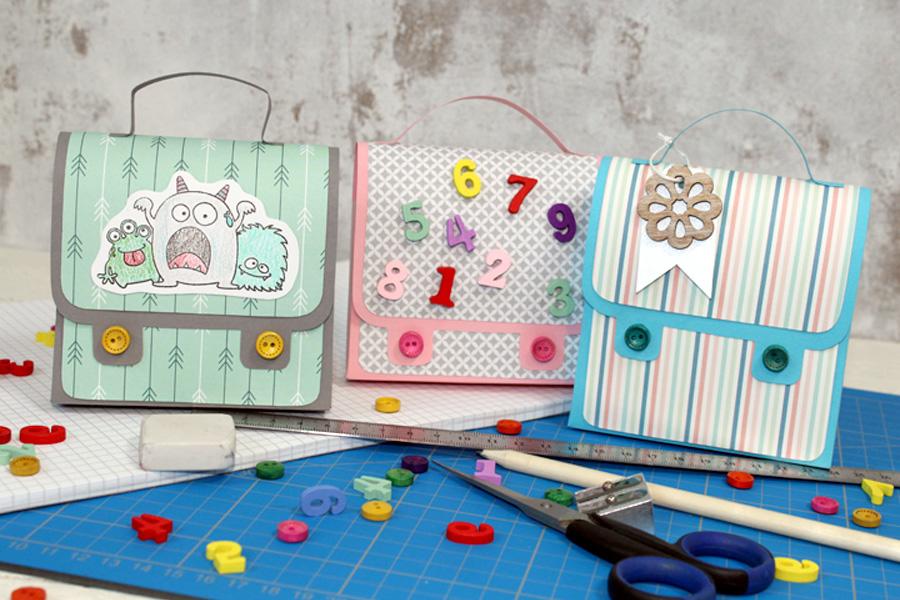
The satchels are now finished in their basic shape. But you can now decorate them as you wish further , e.g. with sprinkles, tags or name tags.

Have fun making your own and starting school! Discover all the materials you need in our online store now and start your DIY-Project!