Sewing Idea Cork Leather Bag
Instructions No. 1349The illustrated bag is sewn in a few steps from two 40 x 35 cm cork leather panels, each panel forming a front and a back of the cork bag. Approximate size of the cork bag: 32 x 38 cm.
In general, the size of the fabric cut depends on the size of the desired fabric bag.
Bag size Fabric cut
20 x 30 cm 43 x 70 cm
25 x 35 cm 53 x 80 cm
30 x 40 cm 63 x 90 cm
Cut your Fabric cut according to the desired bag size. Halve the width of the fabric and fold it inside out (the good side of the fabric inside). Baste the two halves of the fabric together at the sides, with a seam allowance of about 1.5 cm per side.
Now fold the narrow fabric edges along the resulting opening about 2.5 cm, fix the fabric cover with Pins and in a second step fold the fabric edge into the cover so that it is no longer visible. Sew as close as possible from one side seam to the next along the edge of the fabric. This creates a drawstring through which the closure tape can be pulled later.
Turn the resulting bag to the right.
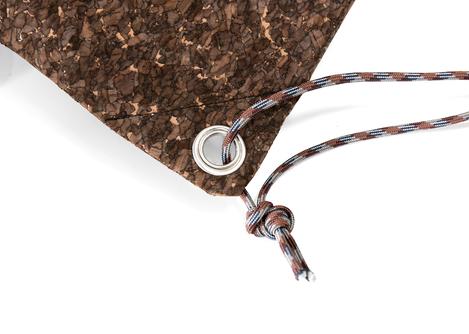
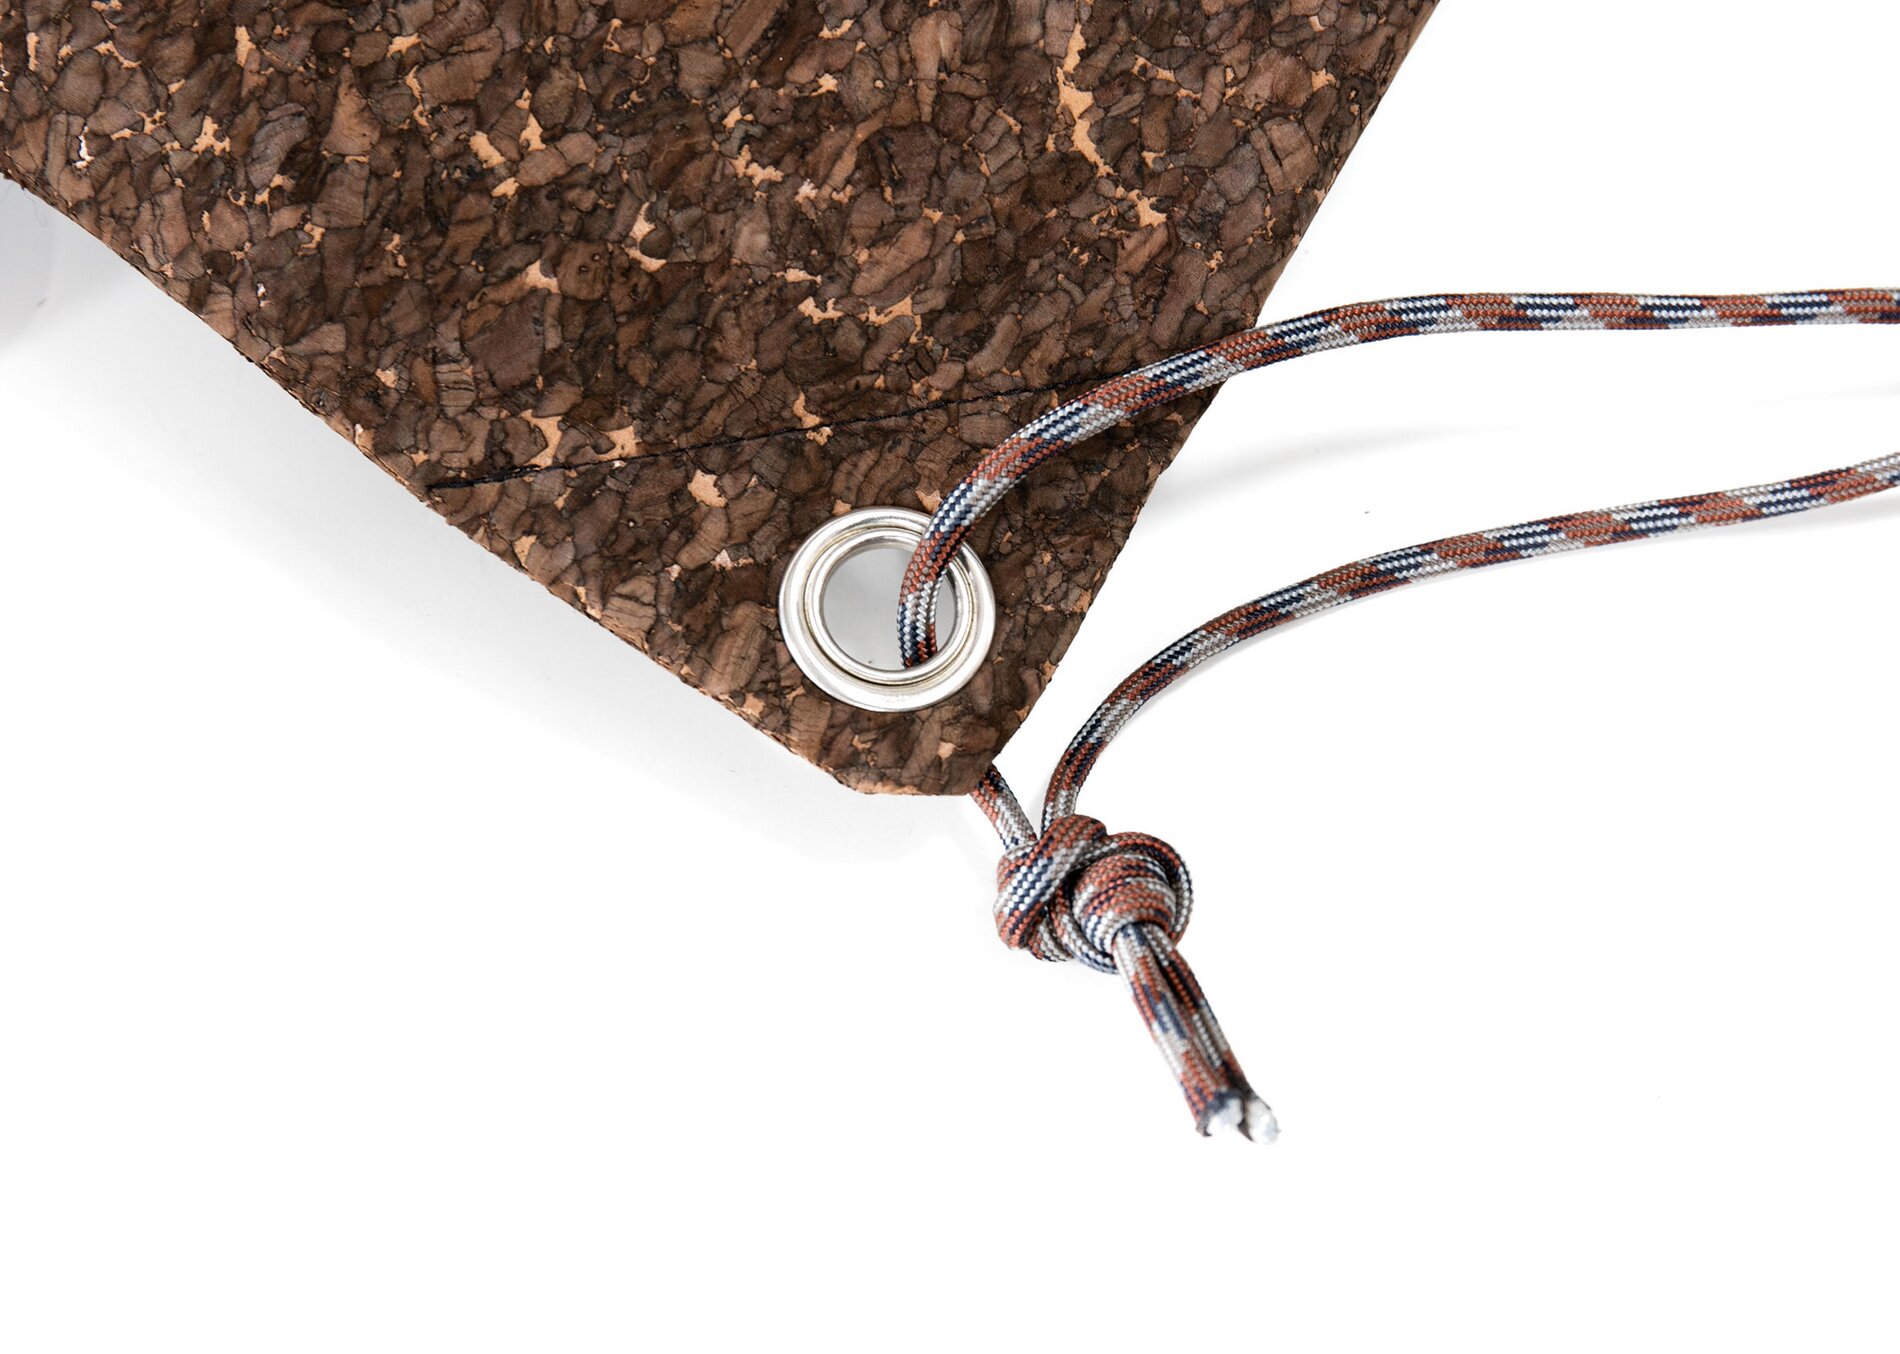
Now the two lower corners of the bag are fitted with metal eyelets . The metal eyelets are usually delivered including punching tools. As described on the eyelet packaging, a hole is first punched in the fabric with a hammer or eyelet pliers. The eyelet is inserted into this hole and fixed with a hammer and the supplied tool.
The bag is sewn as described in the instructions. The model shown by us is a bag of the size 38 x 47 cm. For this purpose two cuttings Cork fabric / cork leather in size 32 x 42 cm and one Fabric cuts in size 24 x 42 cm were used.
Starting from the eyelet, the Paracord cord is laid along the side of the bag, pulled through the drawstring completely once and returned to the eyelet. Here the string is finally fixed with a tight knot.
To pull the cord through the drawstring, we recommend a fabric thread sewing needle. The string can be easily pulled through the large eye of the needle. It is pulled together with the cord into the opening of the drawstring and further once completely through the drawstring loop. Alternatively, you can also use Safety pin as an aid.