- Secure order
- Easy return shipment
- Service-Hotline 04231 - 66811
Instructions No. 3583
Difficulty: Beginner
Working time: 20 Minutes

Using handicraft glue , glue eight groups of four wooden blocks together along their long sides. Make sure to let each of these constructions dry well so that they are stable.
While the blocks of four are drying, take the time to glue seven groups of two wooden blocks together on the short side. Again, it is important that you allow the glue to dry thoroughly.
As soon as everything is dry, take three of the long panels of four and glue two of each together. These will later serve as the base and side walls on which the wine bottle will rest.
Once the previous joints have also dried, drill a hole in the top of two of the side walls. You will need these holes to pull the cord through as a carrying handle.
Use the remaining four panels to form the two outer sides of the base plate. Glue them firmly in place so that the base of your wine carrier stands.
Glue the prepared side walls with the drilled holes a little further in so that there is a compartment for the wine bottle in the middle and space for glasses on the left and right.
Use the previously made two-length constructions to glue three pieces to the front and four to the back of the construction. These will prevent your glasses and the bottle from falling out.
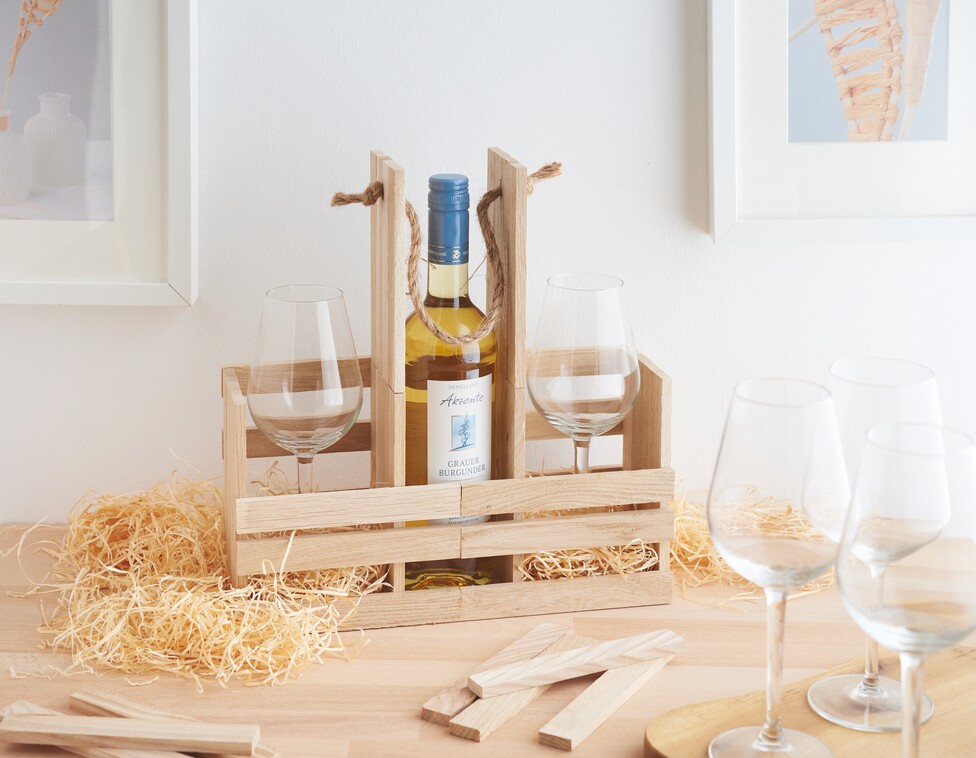
Finally, thread the cord through the holes in the middle side walls and knot them tightly. This gives you a practical carrying handle for your wine carrier. Optionally, you can also place wood wool in the glass compartments to create an additional eye-catcher.
Now that you have finished every single component of your unique wine carrier, there's just one thing missing: the right materials! In our online store, you'll find all the craft supplies you need, such as wooden blocks, handicraft glue, drill bits and cords, to make your project a reality. Visit us and get creative!

