Download the template, transfer it to the felt and cut it out. You need five petals per fairy. Drill a hole in the collar, the hairs of the leaves and in the five petals. For this you can use a
AwlUse a
hole puncher or a slightly thicker sewing needle
Now cut a piece of the cream-coloured organza ribbon about 40-50 cm long, take it double and tie the ends with a double knot. Ribbon Thread a small one on the double knot and then Wooden ball, the big one for the Wooden ball belly, the 5 petals and the collar. Next follow the head, the hairs of the leaves and another small Wooden ball. one. Then you can tie a knot Wooden ball over the small one again.
Next, the face is painted Wooden ball on it. For our flower fairies we have chosen a marker
in and Black white for the eyes and for the cheeks. You can also work with handicraft colours and paint the faces of the fairies with them.
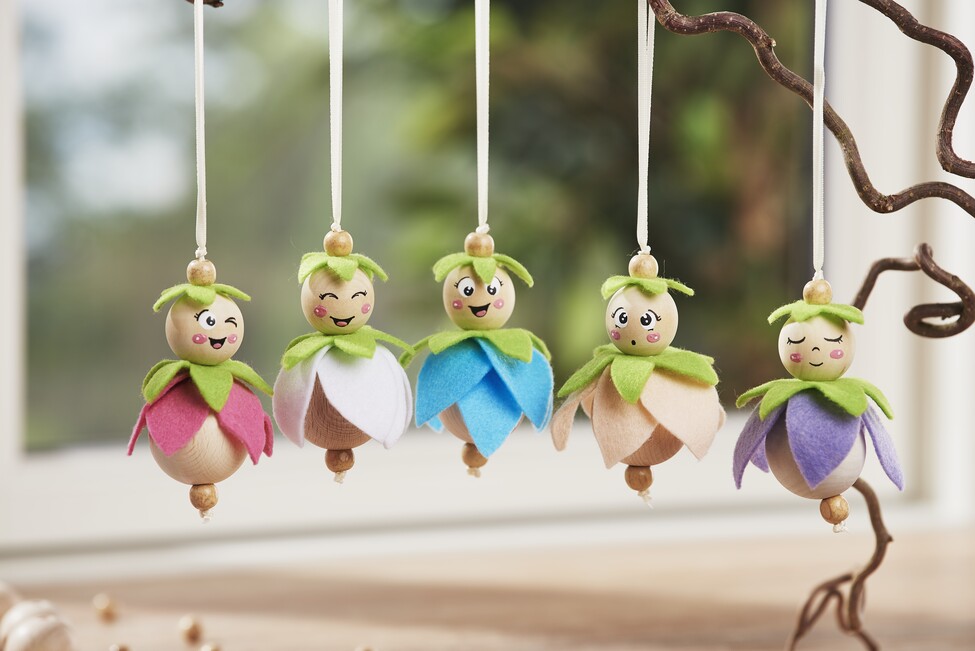
One way to paint the eyes is to paint two white circles of about 0.5cm diameter next to each other. Then paint the eye outlines, pupils and mouth with black paint. At the very end, add two pink dots as cheeks. Wooden ball. Other possibilities for the eyes are slightly curved strokes for sleeping or laughing eyes or two strokes for blinking eyes. You can paint the face as you like and there are countless variations possible.
You can also use the above steps to design the other four flower fairies.