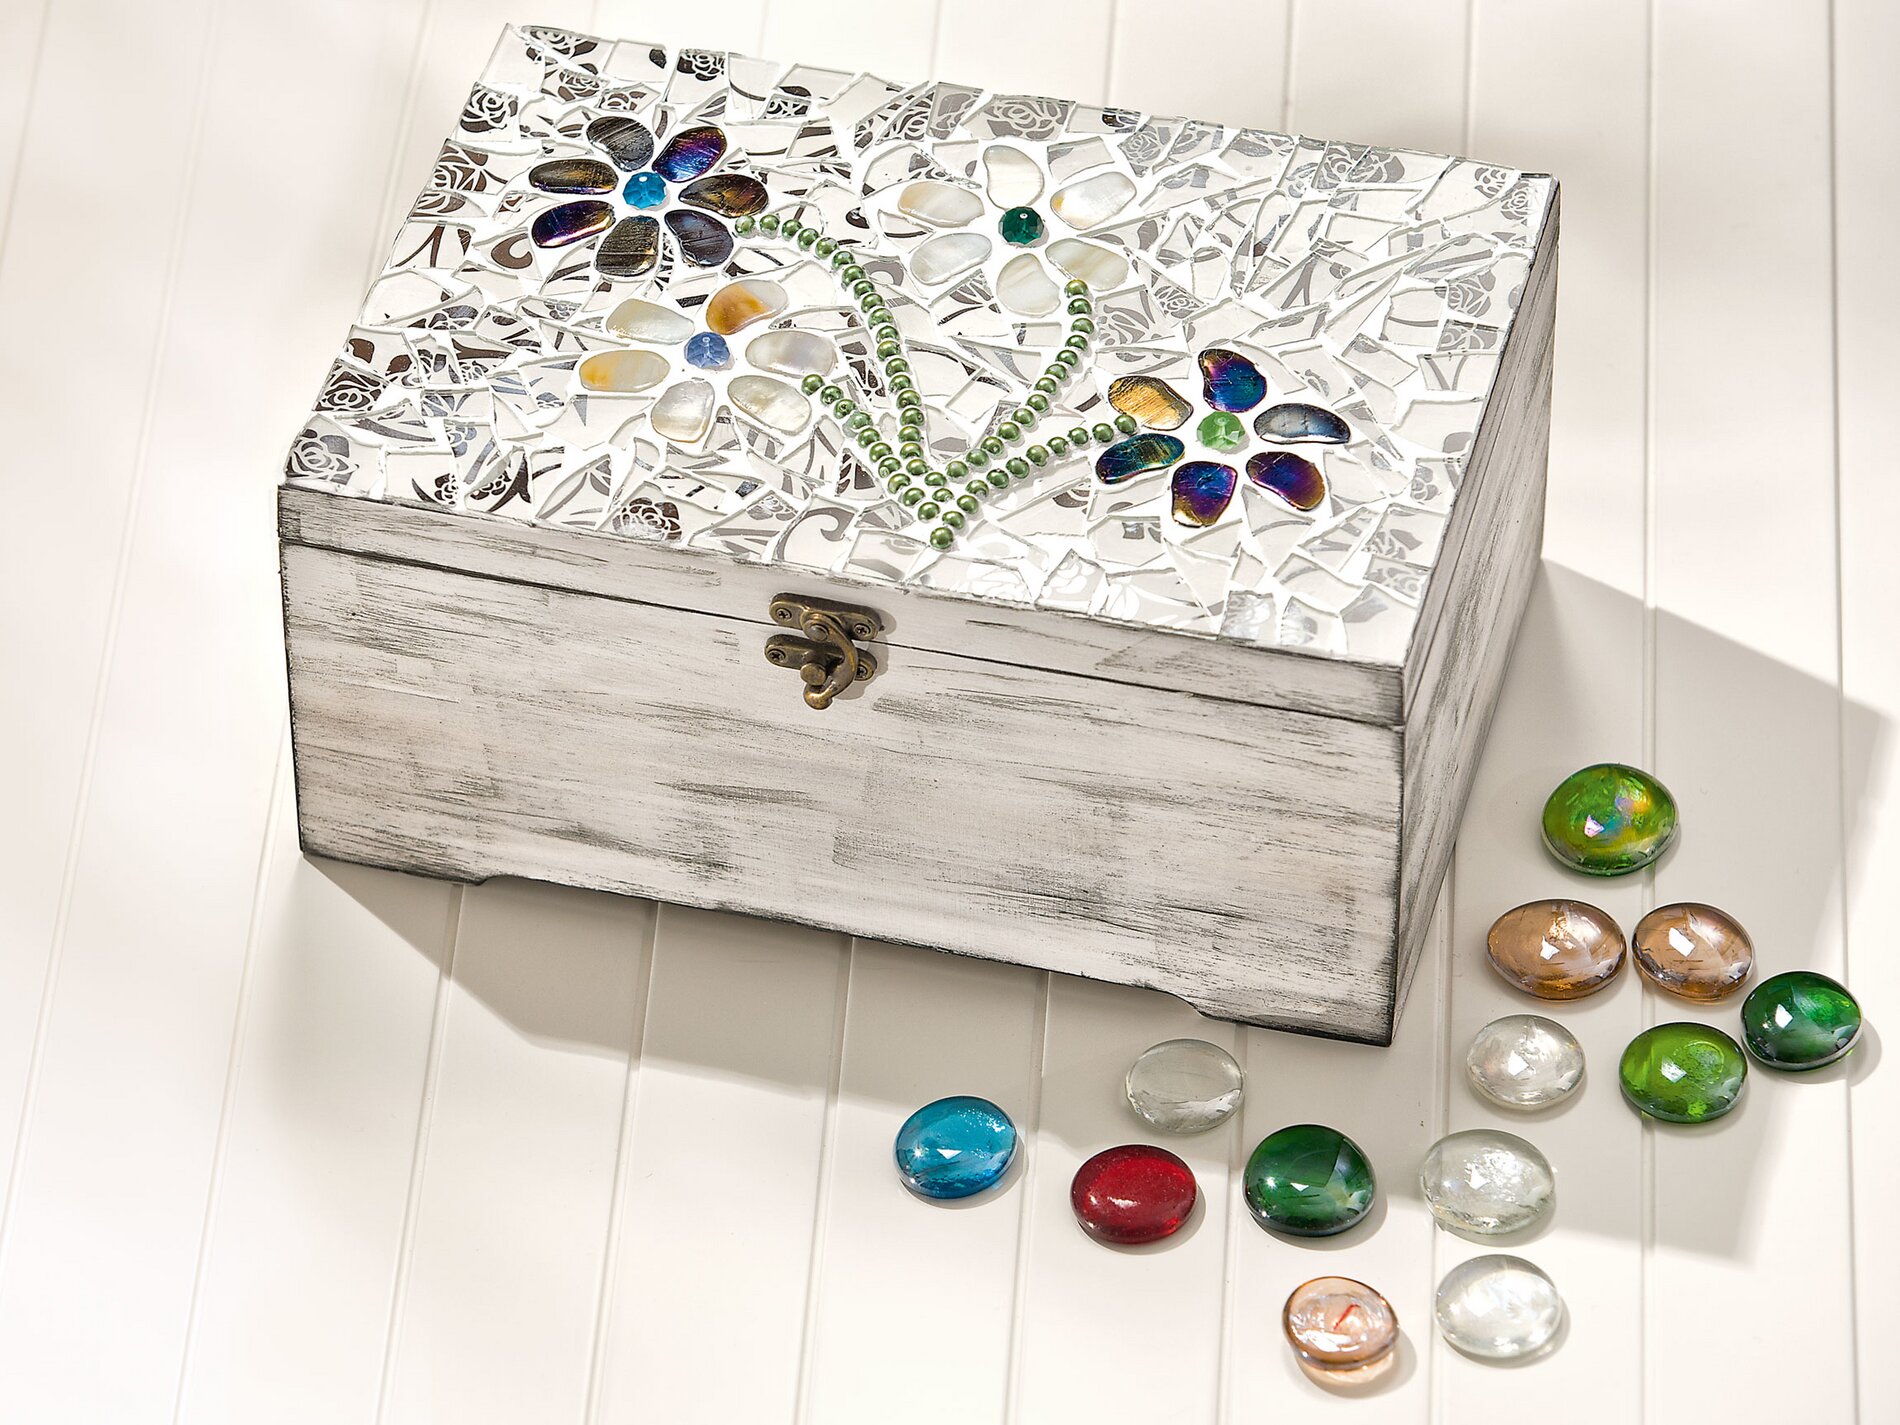
Here's how it works
Prime the chest with white primer.
After drying, sketch the flower pattern on the lid with a pencil.
Place the décor mosaic and glass-cut beads on the sample, then fix it with silicone glue. Apply the glue for this with a stirring wood as a thin line for the beads on the lid and directly on the back of the Décor mosaic stones.
Break the retro mosaic with the mosaic tongs into accurately fitting pieces and glue them with approx. 1 mm wide joints. It is important that the glue is moist, so it should always be applied to only on small areas and not immediately on the entire box
Let the silicone glue dry for about 24 hours, then cover the edges around the mosaic with crepe-Adhesive tape .
Stir the powder of Joint Filler into water until it has the consistency of firm cake dough
Tip: Use a little water at first and add it later if necessary, so you avoid that the Joint Filler becomes too thin.
Apply the Joint Filler generously to the entire mosaic with a stirring wood or a brush until the joints are evenly filled.
When the Joint Filler has dried slightly after about 20 minutes, carefully wipe the mosaic with a damp sponge. The sponge thereby again and again wash out, since otherwise the Joint Filler is not removed, but only further is distributed.
Let it dry for another 24 hours, then wipe the mosaic again with a damp sponge and polish it with a soft cloth.
Finally wipe over the edges and wooden surfaces of the chest with the flat Ink Pads .